Friday, May 29, 2015

You are the Sprinkles on the Cupcake of Life!

Do you know someone that always makes you laugh?  One very good friend certainly fits that description!  Happy Birthday to my good friend Suzy Gray!  I hope you have a friend like that because everybody needs one! :)

I'm sharing the birthday card that I made for her with some of my brand new goodies from my Stampin' Up!  pre-order.  I'm am absolutely LOVING this new Bohemian DSP and coordinating Boho Chic Embossing Folder!


I started with an A2 Rich Razzleberry cardstock base and Layered on a 5 1/4" x 4" piece of Bermuda Bay cardstock that was dry embossed with the new Boho Chic Embossing Folder.  I layered two different patterns of the Bohemian DSP onto Rich Razzleberry cardstock.  I ran some ribbon on the side of the long layer and tied it and adhered it to the card first and then added the square layer.  My cupcake bottom from the Sprinkles of Life Set was stamped onto Very Vanila cardstock and fussy cut.  The top of the cupcake was stamped with Memento Tuxedo Black Ink onto Chocolate Chip Cardstock and then punched out with the Tree Builder Punch.  After using my Embossing Buddy on the cupcake top, I stamped the Sprinkles onto it with Versamark and embossed with Crushed Curry Embossing Powder.  I glued the Cupcake top to the base and adhered to the top square DSP layer with dimensionals.  After stamping the sentiment with Blackberry Bliss Ink onto Very Vanilla card stock, I cut it out and used my Hexagon Punch to cut banner ends.  I backed it with more Rich Razzleberry cardstock that I had also cut banner ends on.  I adhered the sentiment banner to the card with dimensionals. I added some yellow sequins from Pretty Pink Posh's Spring Mix sequin assortment.


The inside sentiment is stamped in Blackberry Bliss Ink.  The candle and the sprinkles inside were stamped with Island Indigo Ink.


I thought it turned out super cute.  I have a lot of ideas running through my head for other cards now! I think this Bohemian DSP may be one of my new favs! :)

Here's the Stampin' Up! Products I used:


Built for Free Using: My Stampin Blog


The Non-Stampin' Up Products Used:  Pretty Pink Posh Spring Mix Sequins, Blue Ribbon from my Stash

Blessings,
Tina

Wednesday, May 27, 2015

Moon Lake Paper Player's Challenge

Hello!  Hope you are having a wonderful day! The last few days have been pretty crazy.  I found out a few days ago that we going to have house guests for about a week.  The problem was that my guest room = my craft room.  Rut Roh!  So.... I've been spending the last 3 days trying to organize/clean my guest/craft room.  It's looking great!  Now I need to spend some time catching up on my cardmaking.  I wanted to make a card for this week's The Paper Player's Challenge.  Since our guests were arriving tonight, I ran home to get everything I needed for this card out of their room and moved to the kitchen table.


I loved this sketch...actually I love sketches in general.  I love to have a starting place and just make it your own.  Fun stuff! :)


I started with a A2 Crumb Cake card base.  I added a layer of Chocolate Chip cardstock that has been dry embossed in a woodgrain embossing folder.  I stamped the boat image onto a 2 1/2" square of watercolor paper with Brown Stazon Ink.  I used my Aqua Painters to color my image.  The inks I used for the watercoloring were Pool Party, Lost Lagoon, Mossy Meadow, Chocolate Chip, and Baked Brown Sugar.  I backed the watercolored image in 2 3/4" square of Wild Wasabi.  I ran some natural ribbon across the Chocolate Chip layer and then ran two strands of Linen thread around it.  I added the layered Image to the right side over the ribbon/thread with dimensionals.  I added three little Basic Gold Buttons on the right that had been threaded with the linen thread.  I adhered them to ribbon with Crystal Effects.   I stamped the "Thinking of you" sentiment onto some Very Vanilla cardstock and layered it onto Wild Wasabi cardstock.  I used my Hexagon Punch to punch banner ends on the sentiment layers.  

Here's the Stampin' Up! products I used on my card:

Built for Free Using: My Stampin Blog


Blessings,
Tina

Sunday, May 24, 2015

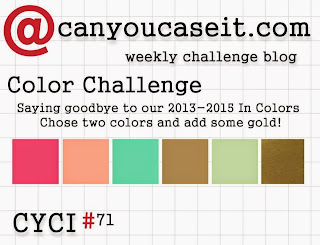
CYCI 71 - Color Challenge, Goodbye 2013-2015 In Colors

Hello everyone!  What a beautiful weekend we've had here in Middle Tennessee.   It was really cool here on Thursday and Friday.  Actually Thursday set a record for the coldest high on that date.  I heard the weatherman say that it was a "Blackberry Winter".  I've heard that term before so I asked my Mom if that is what we were having.  She said "No! The blackberries had already bloomed a couple of weeks ago and that it is a Cotton Britches Winter".  Hmm... ok, Mom, "what is a Cotton Brithes Winter" I asked.  Her answer... "A Cotton Britches Winter is when you've already put up your long johns and you have your cotton britches on and we get a cold spell".  Well there you have it, right from the heart of Tennessee, you now know the difference!  lol

Well I have been hanging around the house trying to get a few things caught up the last day or two.  I'm not sure what we'll be doing tomorrow but I am so thankful for the opportunity to celebrate Memorial Day and for all of the sacrifices made by so many to allow us the freedoms we enjoy!

Since today is Sunday, that means another Can You Case It? Challenge is posted and ready for you to play along.  This week's challenge is a color challenge using two of the outgoing 2013-2015 In Colors, along with Gold! 

http://canyoucaseit.com/?p=1866

For my two In Colors, I chose Strawberry Slush and Baked Brown Sugar.


I decided since I was using some outgoing colors, I would use a brand NEW stamp set with coordinating punch.  This Sprinkles of Life set is so fun.  I started with a 11" x 4 1/4" piece of Baked Brown Sugar cardstock stored at 5 1/2".  I added a 4" x 5 1/4" layer of  DSP from the 2013-2015 In Color Background Designer Paper Stack.  After stamping the cone with Baked Brown Sugar ink onto Whisper White cardstock, I sponged it, then cut it out and glued onto the bottom right of a 3 1/2" x 4 3/4" layer of Baked Brown Sugar cardstock.  I used the new Tree Builder Punch to punch out the ice cream tops and layered them on the cone, alternating the patterns.  I stamped the sentiment in Baked Brown Sugar ink onto Whisper White cardstock and then cut the words or word groups apart.  I sponged the edges of the words and gluded them to the Baked Brown Sugar layer.  I sponged the edge of that entire Baked Brown Sugar layer as well.  I used some Strawberry Slush Ruffled Trim and Gold Sequin Trim and attached to the top of that layer with a Gold Mini Clothespin.  I attached this layer to the top of the card with Stampin' Dimensionals.  I also cut off a few Gold Sequins off some trim and randomly glued them to the front of the card.  I really like the way it turned out.  It is definitely different from my usual style but is a really fun card.

Here are the Stampin' Up Products used on my card:


Built for Free Using: My Stampin Blog


Thanks for stopping by!

Blessings,
Tina

Sunday, May 17, 2015

CYCI #70 - Designer's Choice Challenge - May Flowers Edition

Hello and Happy Sunday!  I hope you've enjoyed your weekend as much as I have.  Actually I've had a few days off work so as wonderful as today is, it's a little sad that tomorrow is back to work! Well since it is Sunday, you know what that means...there's another challenge up at www.canyoucaseit.com.  This week my Design Team is off and so our cards will be posted as Challengers... Fun! :)  I hope you'll check all of the cards out this week and play along! 


My card this week is a simple watercolor using the Butterfly Basics stamp set.  Actually since I often tend to use many stamp sets for one card I challenged myself to use just one set.  It wasn't hard with this set at all though.


I started out with a 11" x 4 1/4" piece of the yummy new Watermelon Wonder cardstock, scored at 5 1/2".  I added a layer of basic black cardstock that was 5 3/8" x 4 1/8".  On a piece of Watercolor paper that was 5 1/4" x 4", I stamped the fern with Mossy Meadow ink and the flowers with Memento Tuxedo Black Ink.  After allowing the ink to dry, I used my Aqua Painters to fill in the open part of the flower images using Mossy Meadow for the stems and leaves and Watermelon Wonder for the flowers.  I dried the watercolored portions with my heat tool and then did a background wash with Mint Macaron and Soft Sky with just a little wash of So Saffron in the upper right hand corner.  I stamped my "Sending Wishes Your Way" sentiment in the upper right with Memento Tuxedo Black Ink and tied on some of the beautiful new Watermelon Wonder Lace.   I then mounted the watercolor paper onto the black layer of the card.  I added a few Pretty Pink Posh Charcoal Sequins an called this one done!   I was able to get the new catalog goodies (Watermelon Wonder and Mint Macaron Inks, Card Stock, and Lace Trim) as a preorder since I'm a Stampin' Up! Demonstrator.  These products will be available for non-Demos to order when the new catalog goes live on June 2, 2015.

Built for Free Using: My Stampin Blog

Non Stampin' Up Products Used: Pretty Pink Posh Charcoal Sequins

Blessings,
Tina

Thursday, May 14, 2015

May OSAT Blog Hoppers - Monochromatic


Hello and welcome to our May OSAT Blog Hop.  I hope you've enjoyed the fabulous projects that Wynne has created!  She is so super talented and quite honestly is a hard act to follow.  As I'm sure by now you know, this month's Blog Theme is Monochromatic.  I have to admit that when I picked my colors I was feeling pretty good since Purple is one of my favorite colors.  But...once I started working on my projects, I was dying to add some teal or turquoise. Well, since that is not allowed, here I go with my two shades of purple: Perfect Plum and Elegant Eggplant, and my neutral pick of Whisper White.


My main card this month uses four different stamp sets:  "Everything Eleanor", "Gorgeous Grunge", "Work of Art" and "Papillion Potpourri".  I was literally all over the place on this card!  lol


My A2 card base was Perfect Plum with a layer of Whisper White.  All of the streaks, and paint splatters are from the fabulous "Gorgeous Grunge" stamp set and were stamped in Perfect Plum after first being stamped off onto scrap paper to give it a softer look.  The florish is from "Everything Eleanor" and it was stamped in Elegant Eggplant.  The butterflies are from "Papillion Potpourri" and were stamped in Versamark embossing ink onto Perfect Plum card stock.  They were then embossed with White embossing powder and punched out with the coordinating butterfly punches.  The sentiment was stamped in the right corner in Elegant Eggplant ink and is from the "Work of Art" stamp set.  I added a few flowers that were punched out in Elegant Eggplant card stock with the flower punch from the Itty Bitty Accent Punch Pack.  I added pearls to the centers of the flowers and adhered them to the card along with three of the larger pearls and a few white Doodlebug Sequins.

In addition to my card this month, I also have a little handbag that will hold about 6 A2 cards and envelopes (I only enclosed 4 since they were embellished).  The little handbag was inspired by a Stamping School Project (www.stampingschool.com).  I used the dimensions for the bag and box insert from Stamping School however I changed the design to make it my own.


Here's a look at the bag from the side. I used a 5" Pierced Circle Die from Little B's for the flap and punched 1/8" holes for the handle of Perfect Plum Taffeta Ribbon. The butterflies on the outside of the closure are from the Butterfly Basics Stamp Set and coordinating framelits.  After layering them, I used my piercing tool to pierce through both butterflies so I could insert a candy dot brad.  Instead of putting a candy dot in the brad, I used one of the larger pearls. The strip at the bottom of the handbag is a 1" strip of whisper white that was randomly stamped with the flourish from "Everything Eleanor" in Elegant Eggplant.


The handbag opens and closes with Basic Grey magnetic snaps. The cards slip right into the box base that is adhered to the inside of the handbag.


I enclosed 4 cards as well as 4 envelopes in the handbag.  The stamp sets used on these cards were "Everything Eleanor", "Papillion Potpourri" and a brand new sentiment set  that will be in the new Stampin' Up! Catalog "Friendly Wishes".  Since I am a Stampin' Up! Demo, I was able to preorder a few things prior to release of the catalog! :)


I hope you've enjoyed my projects today :)  Please continue on the hop by clicking the next button to check out what the super talented Megan has created for you!  


Here's a list of all of the Stops on this Blog Hop:

Eva - http://evascardsandthings.evabussom.com/2015/05/osat-blog-hop-may-monochromatic.html

Justin - http://jkcardsonline.com/?p=16553

Andrea-http://onestampinmothertucker.blogspot.com/2015/05/osat-blog-hop-monochromatic-may.html

Elizabeth Jeanne - http://craftsbyhappystamper.com/2015/05/14/osat-monochromatic-blog-hop/

Debbie - http://www.davdesigns.com/2015/05/osat-may-monochromatic-blog-hop.html

Maggie - http://www.maggiemadecards.com/osat-blog-hop-monochromatic/

James - http://stampinstud.blogspot.com/2015/05/osat-monochromatic-may.html

Wynne - http://mycraftyside1.blogspot.com/2015/05/osat-blog-hop-monochromatic.html

Tina - http://tinascropshop.blogspot.com/2015/05/may-osat-blog-hoppers-monochromatic.html - You are here

Megan - http://meganttstamps.blogspot.com/2015/05/osat-blog-hop-monochromatic.html

Martie- http://martie-pollard.squarespace.com/welcome/2015/5/11/osat-blog-hop-monochromatic

Holly - http://hollyshobbs.blogspot.com/2015/05/osat-blog-hop-monochromatic.html

Lori - http://www.stampindreams.com/my-blog/2015/05/osat-monochromatic-may-blog-hop.html

Diane - http://stampandembellish.com/2015/05/osat-blog-hop-monochromatic/

Darla- http://stampinwithdarlaandsisters.blogspot.com/2015/05/osat-blog-hop-monochromatic.html

Stampin' Up Products Used:

Built for Free Using: My Stampin Blog


Non Stampin' Up Products Used:  Basic Grey Magnetic Snap Closures, Doodlebug White Sequins, and Little B Pierced Circle Dies.

Blessings,  Tina

Sunday, May 10, 2015

CYCI 69 - Sketch Challenge


Hello! Happy Sunday and to all of you Moms... Happy Mother's Day!  I will be spending my Mother's Day with at least one of my sons today so it will be a happy day indeed! :)

Today we have another sketch challenge over at CYCI.  Here's my take on the sketch..


I started with a A2 cardbase of Coastal Cabana cardstock and I layered on a piece of Night of Navy cardstock. I topped that with 2 patterns of  Maritime DSP with a thin piece of Night of Navy seperating the two DSP patterns.  I stamped the Octopus from the Stampin' Up! "Sea Street" stamp set in Coastal Cabana and cut it out with a Dies by Dave coordinating die.  I then using some reverse confetti banner/tag dies to cut out two DSP banners for the bottom of the card as well as a smaller one in Whisper White.  I stamped the sentiment from the Vintage Stampin' Up! "Hello, Sailor" stamp set.  I hung the hello sailor tag from one of the arms of the Octopus and Attached it with Stampin' Dimensionals to my card.

Thanks for stopping by.  I hope you'll check out all of the other great inspiration the Design Team has for you this week and I hope you'll this this sketch challenge a try!

Blessings,

Tina

Stampin' Up! Supplies Used:

Built for Free Using: My Stampin Blog


Non Stampin' Up! Supplies Used:
Dies by Dave "Octopus" Die
Reverse Confetti "Tag Me" Dies

Saturday, May 9, 2015

#TGIF02 Challenge - Celebrate Today

Hello and Happy Saturday!  I needed to make a birthday card tonight and since TGIF Challenge Blog had a new Sketch Challenge up, I thought I'd us the sketch for some inspiration! It's a pretty fun sketch so if you want to play along, click the Image and it will take you to their website :)


Here's my take on this sketch..

I decided to go with some fun colors that matched the Birthday Bash DSP, so I used Tangerine Tango and Bermuda Bay.  My stamping was in Night of Navy.  I used my star embossing folder on the Tangerine Tango layer.  

Here's the inside of my card..


I used all Stampin' Up! Products in this card.  Here are the products used:


Built for Free Using: My Stampin Blog


Blessings,
Tina

Wednesday, May 6, 2015

ICS May Blog Hop Celebrate Dad


Well I have some super exciting news!  I was asked by an extremely talented group of Stampin' Up! Demonstrators to join their Inspire Create Share Monthly Blog Hop!  I am certainly honored and hope that you'll enjoy my card that is all about Celebrating Dad!

One of my favorite go-to stamp sets is "Traveler".  I just LOVE this stamp set. It is so perfect for masculine cards!  My Father's Day card is for my sweet Husband since I lost my Dad quite a few years ago.  Jeff is a wonderful husband and a great Dad to his two adult children as well as a great Step-Dad to my three adult children.  Together we have 5 granddaughters and to them he is a great Papaw!   The "Traveler" stamp that was perfect for Jeff's Father's Day card was the train stamp.  We both absolutely love trains.  About two years ago, we went through the Smoky Mountains on a train ride that was really so much fun  and we saw some of the most beautiful scenery.  For our next train ride, we plan to take a trip out West that will be a few days on a train.

Here's my card for Jeff and I hope you like the way it turned out as much as I did!


I started with a 4 1/4" x 11" card base, scored at 5 1/2" in Basic Black.  My first layer was  4" x 5 1/4" piece of Smokey Slate.  I stamped the World Map Stamp onto it with Basic Gray Ink and adhered it to the black base. I used my 2 1/2" Circle Punch to punch out a piece of Whisper White card stock and stamped the Train Image from the Traveler Set in the Circle with Memento Tuxedo Black Ink.  I glued that to a piece of Basic Black that I had cut with one of the Deco Label Framelit dies.  I then stamped the Train again on another piece of Whisper White card stock and fussy cut it and popped up over the image on the circle using Stampin' Dimensionals.  I used my Paper Piercer to punch a hole in each side of the Deco Label Framelit and Used a Candy Dot Brad with Smokey Slate Dots in each of the holes.  I used Stampin' Dimensionals to put the Deco Label Die onto my World Map layer.  I then stamped two of the ticket images twice from the That's The Ticket stamp set with Memento Tuxedo Black Ink onto Whisper White Cardstock.  I punched the tickets out with the Ticket Duo Builder Punch.  I cut a thin 4" strip of whisper white and started glueing on the tickets for my ticket border.  I adhered that to the front of my card with Tombo multi-purpose adhesive.  (Both the Ticket Duo Builder Punch and the That's The Ticket stamp set are on the retirement list so if you don't have them, you might want to try to grab them before they are gone!)  Next I ran a piece of Basic Gray twine around the front 3 times, just over the tickets, and tied them in a knot.  I used one of the Silver Basic Metal Buttons and ran the twine through the button and tied it in the front to finish off the my card front.


For the inside of my card I stamped the train just inside the right lower corner of a piece of 4" x 5 1/4" Whisper White card stock.  I then stamped the Happy Father's Day Sentiment from the Crazy About You Stamp Set onto a strip of Whisper White card stock.  I used my Hexagon Punch to cut a banner end on each side.  I backed it with a large piece of Basic Black cut the same way.

Please click the next button and continue on to see what the very talented Sharon Armstrong has in store for you!

Here are the Stampin' Up! products I've used on my card:

Built for Free Using: My Stampin Blog


Blessings,  Tina

Sunday, May 3, 2015

TGIF Challenge

Hey guys!  This is a super quick post to share a card I made for a cool new TGIF Challenge Blog.   This week's challenge was a color challenge and I have to admit this color combo was a bit of a stretch for me since these aren't colors I would usually put together.  But.. honestly that's what is so totally cool about challenges.  They stretch you to take chances and do things that are a little out of your comfort zone.

So I decided to not only use the colors from the challenge but to also use the stars.  Here's what I came up with..

I used a pool party base and topped it was a layer of the recent Sale-A-Bration DSP in the Calypso Coral.   I used the Shine like the Stars in the Universe sentiment from Banner Blessings!  I know I use this set a LOT but it really is such a favorite!  My large and medium Stars were cut using the Star Framelits in Crushed Curry.  The smallest stars were punched using the Star punch from the Itty Bitty Punch Pack.  I hand cut the banner ends and backed it in Pool Party.  I stapled some Calypso Coral Pom Pom Trim onto Crushed Curry Chevron Ribbon and adhered to the top of the card.

Here are the Stampin' Up! Items Used on my card:

Built for Free Using: My Stampin Blog


Blessings,
Tina

CYCI 68 Sketch Challenge

Hello and Happy Sunday!  I hope you've have a nice weekend!  I had a nice relaxing Saturday and by the looks of things, Sunday will be a pretty chilled day too!  I have a card class planned for next Saturday so I will need to work on my cards for that at some point this week, just not sure if that is happening today! lol 


This week over at Can You Case It? we have a Sketch Challenge for you.  I really love sketch challenges.  It is so nice to have a starting point and to make it your own.  For this sketch I decided to turn the sketch on it's side for my card.


I started with a 8 1/2" x 5 1/2" piece of Basic Gray Cardstock scored at 4 1/4" for my card base.  I layered on a piece of  the Moonlight DSP that I ran through my Big Shot with a Lil' Inker's Stitched Rectangles Die.  I heat embossing the "Sunshine" sentiment from the Feel Goods Stamp Set with Crushed Curry Embossing Powder onto Whisper White card stock. I then ran that through the Big Shot with a smaller Stitched Rectangle Die and layered that on the larger Rectangle.   I stamped a flower from the Crazy about You stamp set in Crushed Curry and punched out with the coordinating Scallop Circle Die.  I stamped two flowers from the Flower Patch Set, one in Cherry Cobbler and one in Smoky Slate and cut them out with the Flower Patch Framelits.  I glued down the Scallop Flower with Tombo and popped up the Cherry Cobbler flower with a dimensional.  The Smoky Slate flower was glued down at the base of the flower only.  I used some Doodlebug Mini Pearls in the centers of the two flowers layered on top.

Thanks for stopping by and I hope you'll be sure to check out all of the cards that the Design Team has for you this week!

Blessings,  Tina

Here are the Stampin' Up Products I Used:

Built for Free Using: My Stampin Blog


The Non-Stampin' Up Products Used:  Lil' Inkers Stitched Rectangle Dies, Doodlebug Mini Pearls