Tuesday, January 31, 2017

SIP Challenge #84 Tic-Tac-Toe - Otterly Love You!

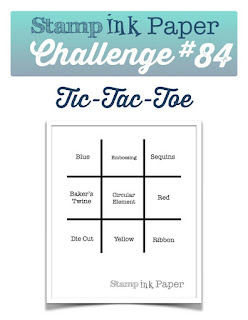
Hello and Happy Tuesday!  I'm super excited today because I was able to use this week's Stamp, Ink, Paper Challenge Tic-Tac-Toe with my brand new MFT Otterly Love You stamp set from the Stamp, Ink, Paper Store!  I ordered this set last Friday and received it Monday!  I call that great service!!!  So for my tic-tac-toe, I went straight across the top row with Blue, Embossing and Sequins!

If you know me at all, you know I love shaker cards!  Well how could I not turn this adorable little otter set into a shaker!  


This was super fun to make!  For my water I sponged Broken China and Peacock Feather Distress Ink onto Bristol Smooth Cardstock and then spritzed with water and dabbed it with a paper towel.  For my otters, first I stamped them with MFT Hybrid Black Ink onto Bistol Smooth Cardstock and then clear embossed them. I used Antique Linen an Vintage Photo Distress Inks to watercolor them.  I'm really beginning to enjoy watercoloring with my distress inks! 

Thanks so much for stopping by!  Blessings, Tina

Here's a list of the products used!

Neenah Crest Solar White 110# Cardstock
Bristol Smooth Cardstock
Mama Elephant All Prettied Up Dies
MFT Otterly Love You Stamp Set
MFT Otterly Love You Dies
Stampin' Up! White Embossing Powder
Stampin' Up! Clear Embossing Powder
Versamark Embossing Ink
MFT Hybrid Black Ink
Tim Holtz Broken China Distress Ink
Tim Holtz Peacock Feathers Distress Ink
Tim Holtz Vintage Photo Distress Ink
Tim Holtz Antique Linen Distress Ink
Doodlebug Swimming Pool Sequins
Clear Glass Sead Beads 
Stampin' Up! Foam Strips
Ranger Fine Tip Aqua Painter
Ranger Multi Medium Matte
Scrap of Black Shimmer Cardstock
Stampin' Up! Red Glimmer Paper Heart

Wednesday, January 25, 2017

PCC 228 Color Challenge - Tickled PInk!

Hello and Happy Hump Day!  You know Wednesday means time for another Paper Craft Crew Challenge and this time it's all about color!  Just pick 3 of the 4 colors in the Challenge Badge and create a new project!  I LOVE these colors!  


I chose to use Pink, Plum and Gray and finally got a chance to ink up my Fun Stamper's Journey stamp set called "Tickled Pink".  


I used distress inks and the ink smooshing method to apply my Picked Raspberry (Pink) and Seedless Preserves (Plum/Purple) to a piece of Strathmore Smooth Bristol Cardstock.  Once it was dry, I used my Misti to make sure I got a good Image of my Flamingo with Stampin' Up! Archival Black Ink.  I used a Tim Holtz fine tip Aqua Painter to watercolor the Flamingo with Picked Raspberry and Black Soot Distress Inks. I used my heat tool to make sure it was dry.  I then put my Bristol panel back in the Misti to stamp my sentiment with more of the Stampin' Up! Archival Black Ink and once I had a good dark impression, I clear embossed it.   Finally I used Mama Elephant Creative Cuts to cut out my Flamingo stitched panel.  To finish off my front panel, I used some Fun Stamper's Journey Silver Silk to make some silver splatters and my Ranger Distress Splatter Brush to splatter some of the Picked Raspberry Ink that had been watered down.  Once again I used my heat tool to make sure the entire panel was completely dry.  I cut a piece of Stampin' Up! Basic Black cardstock with the scallop edged die from the Mama Elephant Creative Cuts set to back my front panel.  Once that was adhered, I glued it to an 11" x 4 1/4" Neenah Crest Solar White 110# Cardstock that had been scored at 5 1/2".

Thanks so much for stopping by and checking out my wild card today!  Blessings, Tina

Tuesday, January 24, 2017

SIP #83 Sketch Challenge with Love To Go!

Hello and Happy Tuesday!  I hope you are enjoying your week.  We've had some unusually warm weather here in Middle Tennessee but unfortunately I believe that has come to an end!  It's going to be back into the low 30's overnight.  I was so enjoying not having to wear a coat!  I'm beginning to think that I was meant to live in Florida because as I'm getting older I am not liking cold weather at all!  

Well of course since it is Tuesday, I'm back over at Stamp, Ink, Paper designing for a new sketch challenge!  I really LOVE this sketch!  It's one of my favorite sketches that I've used the past few months!  


Since it is right at the end of January, I thought I better get started on Valentines Cards.  This one is one of my favorites and will be my card to my better half because we are all about coffee!  Our first date, 10 years ago, was at Starbucks!   Here's my card with an adorable Unity Stamp Co. stamp set called Love to Go!


I really had fun making this card.  I may have gotten a little sequin happy but bling always seeems to be a good idea to me!  lol

Not only do I love the outside with this awesome sketch but I love the inside too since I decided to use the same circle and same type of  banner!


Isn't it just adorable??  Below is a list of all of the products I used!  Thanks so much for stopping by!  Have a wonderful week!  Blessings, Tina

  • Unity Stamp Co. "Love to Go" Stamp Set" (outside of card)
  • Unity Stamp Co. "no remedy for Love" (inside on the white circle)
  • Stampin' Up! "Good Greetings (retired)" (inside on the red banner)
  • Stampin' Up! Real Red Cardstock
  • Stampin' Up! Basic Black Cardstock
  • Stampin' Up! Happy Hearts Embossing Folder (outside black panel)
  • Stampn' Up! Stacked with Love DSP stack (retired) 
  • Memento Tuxedo Black Ink
  • Versamark Embossing Ink
  • Wow Black Embossing Powder
  • Stampin' Up! Mini Sweetheart Punch (retired)
  • Pretty Pink Posh Onyx and Charcoal sequins
  • Stampin' Up! Stitched Circle Thinlit Dies
  • Lil' Inker Stitched Rectangle Dies


Wednesday, January 18, 2017

Paper Craft Crew Sketch Challenge #PCC227 - Unity Stamp Co. Everything (flight of faith)

Hello and Happy Hump Day!  Hope your week is going great!!  I'm back over at Paper Craft Crew today with my take on sketch #227.


For my card I finally broke out a stamp set that I purchased from Unity Stamp Co. for bible journaling called Everything (flight of faith).  Here's my card....


I started with a 5 1/2 " 8 1/2" Basic Black card base, scored at 4 1/4".  Next I added a small strip of Real Red Cardstock that had been embossed with Hearts embossing folder.  I adhered that strip with an adhesive runner.  Next I stamped the feather in black and red bubbles in red from the stamp set onto Neenah Crest Solar White 110# Cardstock.  I then used my Mama Elephant Creative Cuts Die set to cut out the stitched tag.  I used a 1/4" hold punch to punch a hole in the top of the tag.  Next I added some splatters with some Fun Stamper's Journey Cranberry Silk.  I love how easy the splatters are with the silks.  I have 5 colors and need to get some more!   I tied some black fiber ribbon to the top of the tag and attached it to the front of the card at an angle with foam tape.  I stamped the sentiment from my Stampin' Up! Bloomin Love stamp set onto a small strip of the white cardstock with real red ink.  I punched out a red heart with a mini heart punch and added a clear enamel heart to the top of it and then adhered to the front of the tag.  Last but not least, I added three white enamel dots.  I really wish I had red ones so now that's on my must have list!  lol

Thanks so much for stopping by!  Blessings, Tina


Tuesday, January 17, 2017

SIP #82 Natural Elements Challenge

Hello and Happy Tuesday!  Hope you've had a good weekend and that your week is starting off great!   If you were off Monday for Martin Luther King day, congrats!  I wish I had been!  Today I'm back over at Stamp, Ink, Paper with my card for a Natural Elements Challenge!


For my natural elements on my card I used cork for the die cut trees and hemp thread.


I started with an A2 Stampin' Up! Dapper Denim Card Base.  I used a punched our circle to mask my sun and some other post it notes to mask off the hill.  I used On the top portion, I used Soft Sky, and Marina Mist to sponge the sky around the sun.  For the hill I masked off the sky and used Crumb Cake, Daffodil Delight and Hello Honey Inks (all Stampin' Up!).  All of the sponging was done on a 5" x 3 3/4" piece of  Stampin' Up! Whisper White Cardstock.  I used the Gina Marie Tree Frame Die for my trees cut from cork.  I cut off the frame portion off since I wanted to mount it on a smaller panel.  Let me tell you that punching out the portions of the die cut in cork was very tricky.  I love how the trees look but I would not want to cut this one out again.  At least the cork was adhesive backed.  I bought it in a 6x6 pack at Michaels.  I used a retired Craft Spot Tag Set for my sentiment and cut it with the coordinating tag dies. I ran some Tim Holtz Hemp Cording around the panel and tied it through a wooden button and attached the tag under the right side of the button.   The cardinals that I added are the Poppy Stamps Cheery Cardinals die. 

Thanks so much for stopping by!  Blessings, Tina

Thursday, January 12, 2017

OSAT Blog Hop - No Rules New Year!


Hello and Welcome to One Stamp At A Time's January 2017 Blog Hop!  If you've already been hopping than you should have landed here from the blog of my talented friend and partner in crime, Andrea Tracy-Tucker.  If you didn't make sure that you hop all the way through and check out her fabulous blog!  She always has an incredible card and project!

Well as you may already know, this month's theme is No Rules New Year which means we can make whatever we want to make so that's exactly what I did.  I've been having a ball playing with the fabulous Fancy Flowers Card Kit from My Favorite Things!  Here's what I came up with!


So for my card I started with an 11" x 4 1/4" Neenah Crest Solar White Card Base that was scored at 5 1/2" for a top folding card.  My next layer was a piece of 4" x 5 1/4" Tim Holtz Woodgrain Watercolor Cardstock.  On that layer I did some watercolor smooshing with Tim Holtz distress inks in Peeled Paint, Mustard Seed, and Broken Glass.  After the watercolored panel was dry I used MFT Words For Friends to cut out the word "Smile".   The flowers, stems, and leaves from the MFT Fancy Flowers Stamp set were heat embossed onto Neenah Crest Solar White cardstock with White Embossing Flower and sponged with Distress Inks.  After sponging I used a paper towel to remove most of the ink from the white embossing and then layered them on my card with Ranger Multi Medium Matte and Foam Tape.  I added 3 clear dew drops with more of the Multi Medium Matte to finish this one off!


My little craft frame was bought at Michaels for $1.  I sponged it all over with Stampin' Up! Tempting Turquoise Ink and then allowed to dry.  After it dried I added  the "smile" letters that were left over when I cut them out of the panel for my card.  I attached them with Ranger Multi Medium Matte.  My flowers, leaves, and stems were heat embossed in white and sponged with distress inks just as I had done on my card.  I added a sweet picture of my granddaughter Blakely.  If that sweet picture doesn't make you smile, I don't know what would!  lol

Thanks so much for stopping by!  Next up is the fabulous Maria Willis.  I absolutely adore Maria's work and I'm sure you will too!  Just click the Next Button and you'll be there!

http://cardbomb.blogspot.com/2017/01/osat-blog-hop-no-rules-new-year.html


  1. Megan Thompson
  2. Melissa Davies
  3. Jessie Holton
  4. Wendy Cranford
  5. Rick Adkins
  6. Anna Smith
  7. Lori Mueller
  8. Sue Plote
  9. Wynne Grob
  10. Pam Staples
  11. Andrea Tracy-Tucker 
  12. Tina Riddle -That's Me!
  13. Maria Willis
  14. Renee Ondrajka
  15. Kim Smith
  16. Jeanna Bohanon
  17. Marisa Gunn
  18. Justin Krieger
  19. Dena Rekow

Wednesday, January 11, 2017

PCC #226 I'm Bringing Birthdays Back!

Hello and Happy Wednesday!  Hope you are having a wonderful week.   Since today is Wednesday, I'm back over at Paper Craft Crew with a design team card for PCC226 - I'm Bringing Birthdays Back!    If you're anything like me, I'm sure you need to build up your stash of birthday cards so why not make a card and head over and link it up!


For my card this week I pulled out the Balloon Framelits from Stampin' Up! and put together some unlikely colors!


I started with an A2 Basic Gray Cardbase.  I added a layer of Gold Metallic Cardstock and Real Red Cardstock both cut with Mama Elephant Creative Cuts Stitched Scallop Die.  I layered both of them on an angle.  The "celebrate" sentiment is from the Unity Stamp Co November 2016 Kit of the Month.  I loved the font of it!  I embossed it with Gold Embossing Powder.  I added three Gold Metallic die cuts from the dies that accompanied the December 2016 Hero Arts kit.  I cut out 3 balloons with the Stampin' Up! Balloon Dies in Basic Gray, Real Red, and Gold Glitter Cardstock.  I also used those same dies to cut out a Gold Glitter Banner that I adhered to the Red Balloon.  I used Gold Metallic Thread to tie the balloons together.  I used Ranger Multi Medium Matte to attached the bow to the card.  I'm going to give this fun card to my son on Friday for his 30th birthday!  

Thanks so much for stopping by!  Blessings, Tina


Tuesday, January 10, 2017

SIP #81 Color Challenge - Black, White, and a Pop of Color!

Hello and Happy Tuesday!  I hope you are warm where ever you live.  We've gotten some snow here in Middle Tennessee and have been down to single digits and we are NOT used to that!  I was off work last Friday and stayed home Saturday and Sunday.  This week is supposed to warm up to the 60's and I am soooo ready for that!  I'm beginning to think living in Florida might be a good retirement plan!  The older I get the less I enjoy cold weather!  Brrr!  Well since it is Tuesday, it's time for another Stamp, Ink, Paper Challenge.  This week it's all about Black, White, and a pop of color!  So many options with this one!


I recently bought a stamp set from Stamp, Ink, Paper's online store from Concord & 9th called "You are enough" and decided to use the fun flower from that set!


I love this sketchy flower and it would look awesome in so many colors.  My mom grows many different types of lilies and that is what this flower reminds me of.  The floral image has an outline and then two different stamps that fill in color.  I used SU Basic Black Archival Ink for the sketch of the flower on Neenah 110# Crest Solar White cardstock.  The large fill stamp was stamped with  SU Flirty Flamingo (stamped twice) and the darker fill in section was stamped with SU Watercolor Wonder.  The sentiment is from the Simon Says Stamp set "You Matter" and the You was the coordinating You die.  I layered three layers of black for the You die cut and used Ranger Multi Medium Matte  to adhere each layer to the other and the finished word to the card.  I cut the first layer out with a Mama Elephant Creative Cuts Scallop Die and added it to a  Neenah 110# Crest Solar White Card Base that measured 4 1/4" x 11" and was scored at 5 1/2" for a top folding card.  To finish my card off I adhered 3 Pretty Pink Posh dew drops with Ranger Multi Medium Matte.  I'm going to give this beautiful birthday card to my daughter later this month!

Thanks so much for stopping by!  Blessings!  Tina


Wednesday, January 4, 2017

PPC #225 Sketch Challenge MFT Fancy Flowers

Hello!  I hope your first Wednesday of 2017 is going great!  Today I'm over with the Paper Craft Crew  Design Team with my take on a fun sketch.  I just love all of the PCC Sketches!  


Since I recently received the Fancy Flowers Card Kit from My Favorite Things, I decided to use it.  Honestly I've had it a few days but I've been too busy to play with it.  It was definitely time!


So if you've never received a kit from MFT I have to tell you they are awesome.  It included the Fancy Flowers Stamp Set, Fancy Flowers Dies and Words for Friends Dies.  It also included 5 sheets of Smooth White Heavy Weight Cardstock, as well 1 sheet each of Coral Crush, Grape Jelly, Grapesicle, Gravel Gray, Peach Bellini, Periwinkle, and Razzelberry Heavy Weight Cardstocks.  Oh and 10 Envelopes.  How cool is that!  So for my card, the cardbase was an 11" x 4 1/4" piece of the White Cardstock scored at 5 1/2".  The next layer was some of the MFT cardstock in the kit.  Since it wasn't labeled, I'm going to guess that it is the Grapesicle.  If you know differently, please comment and straighten me out.  I wanted to stamp tone-on-tone but didn't have a matching ink so I substitued Stampin' Up! Wisteria Wonder.  I think it matched fairly well.  I used my Misti to make sure that I got good images of the flowers and could stamp more than one at a time.  Next I used some of the White Cardstock to cut a Tag from an older MFT Stitched Tag Die set.  I then ran some adhesive along the back of the left side of the tag and adhered some lace to the side of the tag.  Again with my Misti,  I stamped the flowers and leaves with Stampin' Up! Archival Black Ink onto Bristol Paper.  I used my Zig Clean Color Markers to color the flowers and leaves.   Once the flowers and leaves were dry I attached them with Fast Fuse to the Tag.  I punched a hole with a 1/8" circle punch for the top of the tag and added some Natural Twine from FSJ.  I then attached the tag with Foam Tape to the Front of the Card.  The word Hugs was cut using the Words For Friends dies in the kit.  I attached them to a White Banner I had cut.  I made a nest of some more of the Natural Twine and attached it to the banner with Foam Tape that adhered the Hugs Banner as well.  Last but never least, I had to add 3 purple sequins with Tim Holtz Matt Medium.  I absolutely love how it turned out.  I came close to adding some Wink of Stella but I loved it so much I didn't want to chance it. lol

Thanks so very much for stopping by!  It makes my day!  Blessings, Tina

Tuesday, January 3, 2017

SIP Challenge #80 Card Maker's Choice - Hero Arts Color Layering Deer

Hello and Happy New Year!  I hope you are having a wonderful start to both your week and your year!
Since today is Tuesday, I'm back over designing for Stamp, Ink, Paper for our Card Maker's Choice Challenge this week!  How fun!  I hope you'll head over and link up a card of your own!


So for my card I decided to make an Anniversary Card for my Hubby.  I've been continuing to have fun playing with the Hero Arts Color Layering Deer that I bought from the Stamp, Ink, Paper Store so that's what I used for this card!  There's a hidden meaning in the Deer that I'll tell you later!


So for this Deer, I used the following color layering combination all with Stampin' Up! Inks.   The 1st layer was Sahara Sand, the second layer was Crumb Cake, and for the 3rd layer I inked the stamp with Cajun Craze that was stamped off and then reinked with Crumb Cake.  The outline of the legs and head were both inked up in Soft Suede.  The sentiment was inked up in Soft Suede as well.  The background of the shaker window was a piece of Soft Sky Cardstock that was stamped with the retired Stampin' Up! Wonderland Stamp Set.  I used my Misti to stamp the trees in Old Olive first and then inked the outside edges with the retired SU Mossy Meadow Ink for some dimension.  I added a little bit of white stickles and allowed to dry before I put it in my shaker window.  I used Stampin' Up! Oval Framelits to cut my background, acetate, and window.  I added some Doodlebug White Sequins to the inside of the shaker and used Stampin' Up! Adhesive Foam Strips to layer it up.  I added my Deer with the same adhesive strips so it would as high as the shaker since they are thicker than foam tape or dimensionals.  I used Fast Fuse to adhere the antlers.  I decided to add some greenery to his antlers and stamped those in Old Olive and used the coordinating dies to cut them out.  Finally I added a few Doodlebug White Sequins to the front of the card and some Fun Stamper's Journey Candy Apple Sparkle Elements on the leaves as berries.  They aren't exactly round but I thought they were close enough.  I really wish I had some small Red Jewels.  I'll look for some on my next trip to the craft store!  All in all, I think it turned out super cute!

Ok, so I mentioned that the "Deer" has a secret meaning.  Well we have a neighborhood Deer named Bonnaroo.  He was caught in a fence when he was little and rescued by our neighbors.  His mom was no where to be found so they feed him from a baby.  Since it is illegal here to fence in a Deer to keep as a pet he has free reign of the area but stays mostly right around his rescuers home.  He thinks they are his parents I guess :)  So one day on my way home from work, Jeff called to tell me that Bonnaroo had run into a car.  Notice he ran into the car and the car did not run into him.  It happened just up the street from us and when I got home Bonnaroo was laying in my landscaping right outside our window.  There was some blood around his antlers and he was obviously thrown for a loop but he was alive.  After resting, he finally got up and although a little wobbly he seemed fine.  He was a little disoriented so I told Jeff I was going to walk him home.  I  walked him half way home and he decided to take a short cut through a field and since it was dark I declined. lol  I walked back to my car, and drove around the block to find that he had made it home just fine.  Ever since then Jeff has called me the Deer Whisper!  So after stamping the inside with Happy Anniversary, I'll sign it love, Tina (The Deer Whisperer) lol  Jeff will love it!

Thanks so much for stopping by!  Blessings, Tina

Sunday, January 1, 2017

Hero Arts Color Layering Deer

This will be a super quick post.  I had a little time to play around with an awesome stamp set that I bought from Stamp Ink Paper's Online Store.  It's the Hero Arts Color Layering Deer Stamp and Die Set.  One of the facebook groups I am on, Stampers Swap Shop,  has a stenciled background challenge.  I thought I had a woodland background stencil but I didn't so I made a stencil from a sheet of acetate and a "Winter Forest" Die from Die-Namites.com.  I tried to look the die up but it is likely retired as it wasn't pulling up on their website.  

Here's my card to share..


After I made the stencil, I used a ink blending tool to appy Tim Holtz Distress Peacock Feathers Ink.  My Deer was stamped using my Misti onto Neenah 110lb. Crest Solar White using Stampin' Up! Crumb Cake, Soft Suede, and Tip Top Taupe Ink.  I used my white gel pin to make some of the spots white on his back and to add a dot of white to his eye.  In retrospect, I should have used a white pigment ink for that layer that added the spots and shadows and probably a lighter color for his antlers.   I have more playing around to do for sure. The sentiment was added to the top layer with my Misti because honestly I can't seem to get a good sentiment on a top layer without it.  lol  I sure didn't want to take a chance of messing it up.  I added my deer with foam tape and added three sequins.  

Thanks so much for stopping by!  Blessings, Tina