Showing posts with label Leaflet Framelits. Show all posts

Tuesday, October 17, 2017

SIP Challenge #121 with Stampin' Up! Vintage Leaves

Hello and Happy Tuesday again!  I had a wonderful weekend and have survived Monday again so all is good, right??  lol  As usual Tuesday means another Stamp, Ink, Paper Challenge and this time is another Tic-Tac-Toe with lots of options!


My Card qualifies to go in many directions with this Tic-Tac-Toe.  It could go down the first column, Leaf, Orange, and Twine, or straight across the middle with Orange, Wood and Embossing, or Diagonal with Die Cut, Wood and Twine.  How's that for coloring within the lines this time?  lol
I decided to pull out my favorite fall stamp set by Stampin' Up! Vintage Leaves and the Leaflet Framelits.  I also revisited a fun technique called Joseph Coat.   


I started out by sponging Daffodil Delight, Crushed Curry, Pumpkin Pie, and Wild Wasabi onto Bristol Smooth Cardstock.   I stamped the leaves onto the ink blended cardstock with Versamark and then clear embossed them.  Once embossed I used a brayer to bray Early Espresso Ink over the embossed leaves.  Once the ink dried, I used the coordinating Leaflet Framelits Dies to cut the leaves out.  I did the same type of ink blending onto another Bristol Smooth Cardstock for the background on this card.   The ink blended layer was cut into a panel with Avery Elle Wonky Stitches Dies.  I double matted it with Early Espresso Cardstock and then Pumpkin Pie Cardstock and then attached it to an Early Espresso A2 Card Base.  I used the smaller rectangle from the Avery Elle Wonky set to cut out a piece of the Wood Textures DSP.  I matted it with Early Espresso and then added it to the center of the card.  I stamped the sentiment (from the September Paper Pumpkin kit) using my Misti in Versamark first and then Early Espresso Ink and then clear embossed it.  The leaves were arranged in a bundle of sorts and then used Natural Twine to tie a bow in it.  The leaves were attached with dimensionals.  The smaller ones were adhered to the front with Tombow liquid adhesive. 

Thanks so much for stopping by!  Blessings!  Tina

Wednesday, September 7, 2016

ICS Blog Hop - Technique Time!


Hello and Welcome to the Inspire, Create & Share September Blog Hop!  If you have already been hopping, then you know that this is a Technique Blog Hop!  If you landed her from the Super Talented Claudia Perry's blog, thanks so much for continuing on!  If you started with me, please make sure you click the next button as the end of the post for a lot of Technique Inspiration!

There are honestly so many techniques that I love it was super hard for me to choose but I went with Emboss Resist and threw in a little extra twist with the Joseph's Coat Technique on the leaves!

Here's my card....


I love to use unexpected colors for Fall and Holiday cards so for this card, I did just that!  I started with a 5 1/2" x 8 1/2" piece of Rich Razzleberry Cardstock, scored at 4 1/4".  For my next layer, using Versamark Embossing Ink, I stamped a 5 1/4" x 4" piece of Whisper White cardstock with the Hardwood Stamp.  I then heat embossed it using Stampin' Up! White Embossing Powder.  After the embossed image had cooled, I sponged on Soft Sky and Marina Mist, and Dapper Denim Ink onto the layer keeping the darkest inks toward the outside.  After I sponged, I used a paper towel to rub off any ink that was on my white embossed image.  Next for the Joseph's Coat technique on the leaves, I started sponging Marina Mist, Sweet Sugarplum, Rich Razzleberry and Dapper Denim onto scraps of Whisper White Cardstock in random sections and blending some of the inks together.  Next I clear embossed various leaves from the Vintage Leaves Stamp Set onto the sponged cardstock.  Keep in mind that once you heat up the clear embossing powder, the images seem to disappear onto the sponged cardstock.  Not to worry.. you will see them soon.  Once the clear embossed images were cool, I used my brayer to apply Chocolate Chip Ink all over the cardstock... and then those beautiful leaves reappear!  Yay!  Once I had all my brayering finished, I allowed them to dry a bit and then cut them out using my Leaflet Framelits Dies.  I then arranged them onto the front of my card and adhered with Stampin' Dimensionals.  I made a big Linen Bow and attached it to the leaves stems with glue dots.  Finally I stamped a Banner and sentiment from the Thoughtful Banners Stamp set in Sweet Sugarplum.  I punched it out with the coordinating Duet Banner Punch and also Punched out the same Banner shape with Rich Razzleberry and attached it to the back of the sentiment with Fast Fuse.  The entire Banner sentiment was attached with Dimensionals to the bottom right of my Emboss Resist Hardwood layer.  

For the inside I kept it pretty simple..

I stamped the Maple Leaf from the Vintage Leaves set in a stamped off Sweet Sugarplum so that it was a very light image.  I stamped the Banner and Sweet Friend sentiment (also from Thoughtful Banners) in Marina Mist.  I punched it out with the coordinating Duet Banner punch and used Fast Fuse to Add over the Light Leaf image.  

I hope you enjoyed the Emboss Resist and Joseph's Coat Technique and are ready to head over to the awesome blog of Tammy Dunlap for more technique inspiration.  Just click the next button and you'll be there!


If you are interested in any of the supplies, I used today, below are the links to all of the Stampin' Up Products!  Thanks so much for stopping by today!  Blessings, Tina


Product List

Wednesday, November 4, 2015

ICS Blog Hop - Giving Thanks


Hello!  Hope your November is off to a fantastic start!  Of course since it is the first Wednesday of the month, it's time for a new Inspire, Create & Share Blog Hop!  This month's theme is Giving Thanks!  I think it's an appropriate theme for November, don't you?  If you've already been hopping, you should have landed here from Joni's awesome blog! Doesn't she always have something fantastic to share??  She is so talented!

I decided that this month, instead of a card, I would get a start on some place cards that can double as a mini-card for my Thanksgiving guests.  Here's my project for this month!


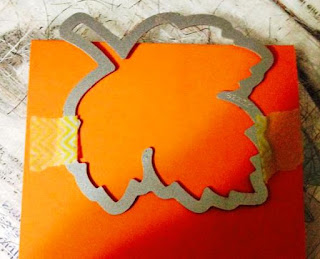
Isn't it awesome when you have an idea, and it works! lol  Well my idea was to make these little place cards out of the Leaflet Framelit Dies.  Here's a close up of one of them..

Of course, if you have the rotary alphabet stamp, you can stamp the guests name instead of handwriting it.  Yes, I have it, but it didn't occur to me until after I had made these!  lol

Here's how they look on the inside.  There is just enough room to stamp my favorite sentiment from the Lighthearted Leaves stamp set.

For my base I started with a 7" x 3 1/2" piece of Pumpkin Pie Cardstock that was scored at 3.5"and folded. I placed my Maple Leaf die from the Leaflet Framelits on the cardstock at an angle where the score and fold was below the top of the die so that it would not cut the top. You will need to remember that you want it to stand on it's on so the angle is important part of accomplishing that!  Here are some pictures of how these were cut.  


 After I had my bases cut, I then cut a piece of Shimmery White Cardstock 4" x 8" and stamped two of the Maple Leaf images from the Vintage Leaves stamp set with Early Espresso Ink.  After stamping I sponged in random sections, Hello Honey, Pumpkin Pie, Cajun Craze, and Mossy Meadow Ink onto the leaf.  I then cut out the two stamped and sponged leaves with the Leaflet die and glued to the top of  my Pumpkin Pie Place Card.  For the outside sentiment I cut two strips Pumpkin Pie Cardstock 1/2" x 5" and stamped with Early Espresso Ink.  I used the Banner Punch to cut out my banner ends and sponged the edges with Soft Suede Ink.  I adhered it to the bottom of the fron with Stampin' Dimensionals.  The Inside sentiment, also from Lighthearted Leaves, was stamped with Early Espresso Ink as well.  For the name tag, I used one of the tags from the Curvy Keepsake Box Die set and cut it out in Pumpkin Pie Cardstock.  I sponged the edges of it with Soft Suede Ink as well and adhered it with Linen Thread to the stem of the leaf.  I used my Early Espresso Stampin' Write Marker to write in the guests names.

Please continue on by clicking the Next Button  to Anna Smith's amazing blog!  You will love it!


Here are a list of the Stampin' Up! Products used on my project:


Built for Free Using: My Stampin Blog


As always, thanks so very much for stopping by!

Blessings,
Tina

Monday, September 21, 2015

WWYS #30 Lighthearted Leaves

Good Evening!  I have a super quick post to enter a card into a fun Challenge Blog called What Will You Stamp?  Here's the flag for this challenge

Lighthearted Leaves has been one of my new favorites from the 2015 Holiday Catalog.  If you've followed my blog I'm sure you realize that as I've posted quite a few card with this awesome stamp set already!  

Here's my card for this Challenge

On this card I started with an A2 Mossy Meadow Cardbase.  I used watercolor paper for my next layer and did a base of Pumpkin Pie and Old Olive for the background.  I heat embossed my leaves onto Shimmery White cardstock with White embossing powder.  I then used daubers to sponge on Old Olive, Hello Honey, Pumpkin Pie, and Cajun Craze Inks.  I used a paper towel to rub off any ink that was on the white embossing and then cut the leaves out using the Leaflet Framelits.  I looped some Linen thread onto my background and then adhered the leaves with Stampin' Dimensionals.  I tied the leaves together at the bottom with some more Linen Thread.  The sentiment was a watercolor wash background that was stamped with Cajun Craze Ink.

Thanks so much for stopping by!

Blessings,  Tina

Wednesday, September 2, 2015

ICS Blog Hop Introducing the Holiday Catalog


Hello and welcome to September's Inspire, Create & Share Blog Hop introducing the Holiday Catalog!  I have to tell you this year's Holiday Catalog is full of all kinds of wonderful goodies that have made it to my "Must Have" List!   If you've already been hopping, you should have landed here from Claudia Perry's blog.  Claudia is a hard act to follow but I'll do my best! :)


For my card I decided to go with a Thanksgiving/Fall theme with the beautiful Lighthearted Leaves Stamp Set.  This set coordinates with the Leaflet Framelit Dies and has just so many possibilities.


I started with an A2 card base of Pumpkin Pie cardstock.  My top layer was Crumb Cake cardstock and two of the leaf images from Lighthearted Leaves were stamped tone on tone with Crumb Cake Ink.  I also used the Crumb Cake Ink to sponge the edges of that layer.  I heat embossed in White on the Shimmery White Cardstock the same two leaves and used my sponge daubers to apply the various shades of ink on them.  The inks I used were Cajun Craze, Old Olive, Hello Honey, and Pumpkin Pie.  After I had sponged the leaves, I used a paper towel to wipe off any ink film from the white embossing.  I then cut the embossed and sponged leaves out using the Leaflet Framelits and used dimensionals to adhere them onto my card.  The sentiment was stamped used Cajun Craze ink onto watercolor paper that had a watercolor wash of some of the leaf colors.  I used my Lots of Labels Framelit Dies to cut out the sentiment.  I added two Cajun Craze candy dots, one of each side of the label.

I also added a bit of Gold Thread under the leaves and splattered some Gold glitter on to the background as well.

I hope you've enjoyed my card and hop on over to the next stop to check out what the super talented Anna has for you!  Just click the next button and you'll be at her blog!


Here are the products I used on my card:
Built for Free Using: My Stampin Blog


Thanks for stopping by!

Blessings,
Tina

Wednesday, August 26, 2015

Lighthearted Leaves Spotlight on the Holiday Catalog

I absolutely LOVE the new Stampin' Up! Holiday Catalog!  Today I had a little time to finally play with one of the new sets that I received on my preorder.  I used a couple of techniques and had lots of fun getting inky on this one!

First of all, let me say one thing.. Where has Pumpkin Pie Cardstock been all my life??  I just got my first pack of it today.  Yep.. I've had tons of Stampin' Up! Cardstock colors but never Pumpkin Pie!  It is such a yummy color!  I love Pumpkin anything so I should have known, right?  I mean Pumpkin Spice Latte is my all time favorite Starbucks drink so of course I would love Pumpkin Pie Cardstock. On this card I started with an A2 Yummy Pumpkin Pie Cardstock Card Base and layered in a 4" x 5 1/4" piece of Old Olive Cardstock.  My top layer was Whisper White.  For the Masking Technique I used Post-It Notes to Mask the Top and Bottom Portions of the White Layer and stamped with different stamps from the Lighthearted Leaves Stamp Set using Old Olive, Hello Honey, and Cajun Craze.  I used a Pumpkin Pie Marker to color in some of the design on one of the more decorative leaf styles and add some of that yummy color! I stamped the sentiment in the lower right corner in Cajun Craze.   For my larger leaves, I used the Emboss Resist Technique.  I heat embossed in White three of the Lighthearted Leaves onto Shimmery White Cardstock.  I then used my daubers to sponge in Cajun Craze, Pumpkin Pie, Hello Honey, and Old Olive Ink onto the Leaves and then cut them out with the new Leaflet Framelits. Let me just say that if you have never sponged on the Shimmery White Cardstock, what are you waiting for??  It goes on so smoothly and has such a luscious shimmer!   I used a paper towel to rub down the white embossing after sponging so that the white wouldn't have ink residue on it.  I tied three of the leaves together with some of the Linen Thread and then popped them up with Stampin' Dimensionals.
Built for Free Using: My Stampin Blog


Thanks for stopping by!

Blessings,
Tina