Showing posts with label Lighthearted Leaves. Show all posts

Tuesday, November 14, 2017

SIP #125 Color Challenge with Stampin' Up! Vintage Leaves

Hello and Happy Tuesday!  Hope you are having a fabulous Fall weather week.  Today is of course another Stamp, Ink, Paper Challenge and is my very last Fall Card of the year!  Take a look at the Challenge Graphic.. it really does scream fall to me!


I decided considering the colors in the challenge that it would be a perfect time for one last card to mail out for Thanksgiving.  I used the incredible Vintage Leaves stamp set from Stampin' Up! but the
sentiment is from the retired Lighthearted Leaves stamp set.  I love this sentiment and can't seem to part with this set!  All of my stamping was done on one layer of Watercolor Paper.  I used the smooshing technique to smoosh some Pumpkin Pie, and Daffodil Delight Ink onto the watercolor paper and dried in between layers with my heat tool.  Once completely dry I ran my embossing buddy over the front of the card.  I used my Misti to stamp the leaves and Sentiment first in Versamark and then in Early Espresso.  I then heat embossed all of the stamping with clear embossing powder.  There ending up being just alittle more white on the stamped panel than I wanted so I took a sponge and a little bit of Daffodil Delight Ink to fill in the other areas.  I used my Lil' Inker Stitched Rectangle Dies to cut out the stamped panel and layered on a skinny layer of Early Espresso Cardstock.  All of that was mounted to a A2 card base of 110# Neenah Classic Crest Solar White Cardstock.  Lastly I added a few sequins from Pretty Pink Posh to finish it off.

Thanks so much for stopping by!  Blessings, Tina


Thursday, November 19, 2015

Stampin Friends Thanksgiving Blog Hop

Hello!  Hope your Thursday is off to a fabulous start!  It is so hard to believe that we are just a few days away from Thanksgiving but we sure are!  This month's Stampin Friends Blog Hop is all about Thanksgiving.

We are blessed with 3 super talented Guest Hoppers:  


This month we have a fun surprise for you!  Do you love crafty supplies?  If so, comment on all 12 posts in this hop and email Elizabeth everyone's favorite color to happystamper508@gmail.com. 
What do you get? In addition to enjoying all of this group's creations, you'll be entered to win a fun crafty present from every one of the bloggers! That's 12 crafty presents! Just a little thank you for your time!

If you've already been hopping you should have landed here from Wynne Grob's fabulous blog!  She is always so creative!  If you haven't been there yet, make sure you click the Previous button so you can go back and check it out!  


I used one of my favorite stamp sets on today's card, Lighthearted Leaves!  I decided since I've been using this set with such traditional fall colors that I wanted to include a not so traditional color on today's projects.. so I added some Rich Razzleberry and I love how it turned out!  I am particularly blessed this year in that my son's sweet girlfriend, Kaci, has invited us to her new home for Thanksgiving dinner.  I made this card and gift for her and I know that she will appreciate the colors in this one!


I have a card and an LED candle that I embellished with Burlap Ribbon and some watercolored background leaves.


My card started with a Rich Razzleberry A2 cardbase and was topped with a 5 1/4" x 4" Hello Honey Cardstock.  My top layer was Watercolor Paper that has a background created with the Reverse Smooshing method.  I applied Rich Razzleberry and Hello Honey ink directly from the stamp pad to wax paper.  I spritzed the wax paper with water and then spritzed the watercolor paper with water as well.  I pressed the wax paper ink side down on the watercolor paper and smooshed the ink by pressing the back of the wax paper.  After removing the wax paper, I blotted excess ink with a paper towel and then dried the background with my Stampin' Up! Heat Tool.  I heat embossing the sentiment with Gold embossing powder.  The large leaf was stamped with Black Archival Ink onto Watercolor Paper.  I used my aqua markers and various inks to color in the image.  The other leaves were created by using the same technique as the background on an additional piece of watercolor paper.  I stamped the leaves over the watercolored background with Black Archival Ink.  I used my Leaflet Framelits Dies to cut out all of the leaves.  I tied them together at the stems with Linen Thread and glued the bottom leaf down using Multipurpose glue and then attached the other two using Stampin' Dimensionals.   I used a little multipurpose glue mixed with water and an aqua marker to create a splatter of glue on my card and then added some Gold Stampin Glitter.  


For my LED candle, I attached the Burlap Ribbon to the candle with Beacon 3 in 1 glue.  I created a watercolor wash of Rich Razzleberry and Hello Honey and used Black Archival Ink to stamp the leaves over the background once it had dried.  I cut out my leaves with the Leaflet Framelit Dies and tied 3 of them together with Linen Thread.  I attached to the Burlap Ribbon using more of the Beacon 3 in 1 glue.  

Oh and though I didn't use my favorite color on today's card, it's Turquoise!  Don't forget to email Elizabeth and get entered in the drawing!  

Next in line for some awesome Thanksgiving inspiration is the fabulous Deana Benson's blog!  Just click the next button and you'll be there!

Here is a list of all of the hoppers this month in case you lose your way
Tina Riddle - You are here!

Here are the Stampin' Up! Products used today:

Built for Free Using: My Stampin Blog

Wednesday, November 4, 2015

ICS Blog Hop - Giving Thanks


Hello!  Hope your November is off to a fantastic start!  Of course since it is the first Wednesday of the month, it's time for a new Inspire, Create & Share Blog Hop!  This month's theme is Giving Thanks!  I think it's an appropriate theme for November, don't you?  If you've already been hopping, you should have landed here from Joni's awesome blog! Doesn't she always have something fantastic to share??  She is so talented!

I decided that this month, instead of a card, I would get a start on some place cards that can double as a mini-card for my Thanksgiving guests.  Here's my project for this month!


Isn't it awesome when you have an idea, and it works! lol  Well my idea was to make these little place cards out of the Leaflet Framelit Dies.  Here's a close up of one of them..

Of course, if you have the rotary alphabet stamp, you can stamp the guests name instead of handwriting it.  Yes, I have it, but it didn't occur to me until after I had made these!  lol

Here's how they look on the inside.  There is just enough room to stamp my favorite sentiment from the Lighthearted Leaves stamp set.

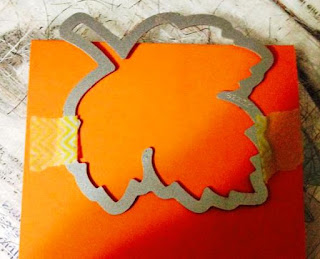
For my base I started with a 7" x 3 1/2" piece of Pumpkin Pie Cardstock that was scored at 3.5"and folded. I placed my Maple Leaf die from the Leaflet Framelits on the cardstock at an angle where the score and fold was below the top of the die so that it would not cut the top. You will need to remember that you want it to stand on it's on so the angle is important part of accomplishing that!  Here are some pictures of how these were cut.  


 After I had my bases cut, I then cut a piece of Shimmery White Cardstock 4" x 8" and stamped two of the Maple Leaf images from the Vintage Leaves stamp set with Early Espresso Ink.  After stamping I sponged in random sections, Hello Honey, Pumpkin Pie, Cajun Craze, and Mossy Meadow Ink onto the leaf.  I then cut out the two stamped and sponged leaves with the Leaflet die and glued to the top of  my Pumpkin Pie Place Card.  For the outside sentiment I cut two strips Pumpkin Pie Cardstock 1/2" x 5" and stamped with Early Espresso Ink.  I used the Banner Punch to cut out my banner ends and sponged the edges with Soft Suede Ink.  I adhered it to the bottom of the fron with Stampin' Dimensionals.  The Inside sentiment, also from Lighthearted Leaves, was stamped with Early Espresso Ink as well.  For the name tag, I used one of the tags from the Curvy Keepsake Box Die set and cut it out in Pumpkin Pie Cardstock.  I sponged the edges of it with Soft Suede Ink as well and adhered it with Linen Thread to the stem of the leaf.  I used my Early Espresso Stampin' Write Marker to write in the guests names.

Please continue on by clicking the Next Button  to Anna Smith's amazing blog!  You will love it!


Here are a list of the Stampin' Up! Products used on my project:


Built for Free Using: My Stampin Blog


As always, thanks so very much for stopping by!

Blessings,
Tina

Wednesday, October 7, 2015

ICS Blog Hop - Fall for All


Hello and welcome to the October Inspire, Create & Share Blog Hop!  If you've already been hopping, you should have landed here from the super talented Jen Guarino's blog!  

I'm so happy that this month's ICS Blog Hop theme is "Fall for All"!  I just love Fall and it's finally beginning to feel like it here in Middle Tennessee!  One of my favorite things about Fall is the beautiful leaves changing colors.  With all of the trees around here it is a gorgeous sight for sure!

Here's my Fall for All card that is really all about the changing leaves!


My A2 card base was Early Espresso with a thin layer of Tangelo Twist and top layer of Old Olive Cardstock.  On the Old Olive layer I stamped some of the leaves from the Vintage Leaves stamp set tone on tone with Old Olive Ink.  For the colored leaves I used a fun technique called Joseph's Coat Technique that my friend Ginger Pelfrey shared with me a few weeks ago.  For a link to a video by Tami White on how to do this technique click here.  If you've not done this technique, I'm sure you'll love the video.  I sponged Cajun Craze, Tangelo Twist, Old Olive, Hello Honey, Daffodil Delight, and Soft Suede onto Whisper White Cardstock.  I then stamped my leaves onto the sponged cardstock with Versamark and embossed them with clear embossing powder.  Next I brayered Early Espresso ink all over my cardstock.  The leaves were then cut out with the Leaflet Framelit Dies and popped up with Stampin' Dimensionals.  I then splattered a little Early Espresso and Tangelo Twist Ink on my card.  (Yep, I went a little crazy with the splattering, maybe less is more...)


My sentiment from the Light Hearted Leaves Set was stamped in Early Espresso on Tangelo Twist cardstock and then clear embossed.  I die cut the sentiment with one of the Lots of Labels Framelit Dies and sponged the edge tone on tone with Tangelo Twist ink.  It was adhered to the card front with more Stampin' Dimensionals and a Candy Dot was added on each side of the label.


For the inside of the card I added a layer of Old Olive and then a layer of Crumb Cake.  I stamped one of the Vintage Leaves tone on tone with Crumb Cake Ink and then added the other sentiment from Lighthearted Leaves in Early Espresso over that.  I added the bottom part of one of my Joseph's Coat Leaves that had previously been cut for the top of the card onto the inside top edge.  I also did a little splattering of some of the Tangelo Twist ink on the inside of my card.  

I hope you've enjoyed my Fall for All card and are ready for some more inspiration!  Next up is the Fabulous Tammy Dunlap's blog!  Just click next button below and you'll be there!


Below are the products I used on my card:


Built for Free Using: My Stampin Blog


Thanks so much for stopping by!  Blessings, Tina

Wednesday, September 30, 2015

September D's Stamping Team USA Blog Hop


Hello!  Welcome to the very first D's Team USA Blog Hop.  If you've been hopping or skipping, you should have landed from Megan Thompson's blog.  Wasn't her card beautiful?   As you probably know by now, our Hop Theme is Fall or Halloween this month.  Once again, I have used my favorite new Fall themed set, Lighthearted Leaves.  I know, I know, I keep using this set.  But what can I say, I love it!


So I've done several techniques with this set previously.   I had my heart set on watercoloring this gorgeous maple leaf but I didn't want to use a harsh ink on my beautiful photo polymer stamps.  Then it hit me, I can clear emboss the Stampin' Up! Classic Ink.  Yay!  Problem solved!  I stamped this gorgeous leaf with Early Espresso Ink onto Very Vanila cardstock and then immediately clear embossed.  Once embossed and dried, I watercolored it and cut it out using the Leaflet Thinlit Dies.  My second leaf was stamped in Early Espresso onto Old Olive Cardstock and then cut out as well.  The background was a reverse smooshing technique on watercolor using a few different colors.  I used my aqua marker to make so splatters of various inks on the background after it had been dried.  Here's a close up of some of the splatters.


Next on our Hop is the fabulous Sue Parker's blog!  I know you won't want to miss her awesome card!  Just click the next button and you'll be there!


Here are the other hoppers:


Here are the products I used:

Built for Free Using: My Stampin Blog


Thanks so much for stopping by!

Blessings,
Tina

Wednesday, September 2, 2015

ICS Blog Hop Introducing the Holiday Catalog


Hello and welcome to September's Inspire, Create & Share Blog Hop introducing the Holiday Catalog!  I have to tell you this year's Holiday Catalog is full of all kinds of wonderful goodies that have made it to my "Must Have" List!   If you've already been hopping, you should have landed here from Claudia Perry's blog.  Claudia is a hard act to follow but I'll do my best! :)


For my card I decided to go with a Thanksgiving/Fall theme with the beautiful Lighthearted Leaves Stamp Set.  This set coordinates with the Leaflet Framelit Dies and has just so many possibilities.


I started with an A2 card base of Pumpkin Pie cardstock.  My top layer was Crumb Cake cardstock and two of the leaf images from Lighthearted Leaves were stamped tone on tone with Crumb Cake Ink.  I also used the Crumb Cake Ink to sponge the edges of that layer.  I heat embossed in White on the Shimmery White Cardstock the same two leaves and used my sponge daubers to apply the various shades of ink on them.  The inks I used were Cajun Craze, Old Olive, Hello Honey, and Pumpkin Pie.  After I had sponged the leaves, I used a paper towel to wipe off any ink film from the white embossing.  I then cut the embossed and sponged leaves out using the Leaflet Framelits and used dimensionals to adhere them onto my card.  The sentiment was stamped used Cajun Craze ink onto watercolor paper that had a watercolor wash of some of the leaf colors.  I used my Lots of Labels Framelit Dies to cut out the sentiment.  I added two Cajun Craze candy dots, one of each side of the label.

I also added a bit of Gold Thread under the leaves and splattered some Gold glitter on to the background as well.

I hope you've enjoyed my card and hop on over to the next stop to check out what the super talented Anna has for you!  Just click the next button and you'll be at her blog!


Here are the products I used on my card:
Built for Free Using: My Stampin Blog


Thanks for stopping by!

Blessings,
Tina

Wednesday, August 26, 2015

Lighthearted Leaves Spotlight on the Holiday Catalog

I absolutely LOVE the new Stampin' Up! Holiday Catalog!  Today I had a little time to finally play with one of the new sets that I received on my preorder.  I used a couple of techniques and had lots of fun getting inky on this one!

First of all, let me say one thing.. Where has Pumpkin Pie Cardstock been all my life??  I just got my first pack of it today.  Yep.. I've had tons of Stampin' Up! Cardstock colors but never Pumpkin Pie!  It is such a yummy color!  I love Pumpkin anything so I should have known, right?  I mean Pumpkin Spice Latte is my all time favorite Starbucks drink so of course I would love Pumpkin Pie Cardstock. On this card I started with an A2 Yummy Pumpkin Pie Cardstock Card Base and layered in a 4" x 5 1/4" piece of Old Olive Cardstock.  My top layer was Whisper White.  For the Masking Technique I used Post-It Notes to Mask the Top and Bottom Portions of the White Layer and stamped with different stamps from the Lighthearted Leaves Stamp Set using Old Olive, Hello Honey, and Cajun Craze.  I used a Pumpkin Pie Marker to color in some of the design on one of the more decorative leaf styles and add some of that yummy color! I stamped the sentiment in the lower right corner in Cajun Craze.   For my larger leaves, I used the Emboss Resist Technique.  I heat embossed in White three of the Lighthearted Leaves onto Shimmery White Cardstock.  I then used my daubers to sponge in Cajun Craze, Pumpkin Pie, Hello Honey, and Old Olive Ink onto the Leaves and then cut them out with the new Leaflet Framelits. Let me just say that if you have never sponged on the Shimmery White Cardstock, what are you waiting for??  It goes on so smoothly and has such a luscious shimmer!   I used a paper towel to rub down the white embossing after sponging so that the white wouldn't have ink residue on it.  I tied three of the leaves together with some of the Linen Thread and then popped them up with Stampin' Dimensionals.
Built for Free Using: My Stampin Blog


Thanks for stopping by!

Blessings,
Tina