Showing posts with label Paper Challenge. Show all posts

Tuesday, November 19, 2019

SIP #206 Stamp, Ink, Paper Thanks Card Challenge

Hello and Happy Tuesday!  It's time for another Stamp, Ink, Paper Challenge and I was determined to use a stamp or two from my stash that I hadn't used before!


I actually used 3 products that I hadn't used befoe!  First I used two older products from Hero Arts that I honestly think they don't even carry anymore... The Hero Arats Bamboo Background Stamp and the Color Layering Koala Stamp Set.  At least I combined them with a NEW product.. and it's one of my favorites... The Concord & 9th Tall-Type Alphabet!  If you are a fan of the Rae Dunn Craze like I am, you'll love this awesome Long Letter Aphabet!!!!  Oh my when I saw this new Alphabet set from Concord & 9th I was soooo excited!  

Thanks so much for stopping by! 
 Blessings,  Tina

Tuesday, January 22, 2019

SIP #183 Theme Challenge - All My Love

Hello and Happy Tuesday!  My Monday was so loooooong!  I thought it would never end!  I was not exactly full of inspiration after a 12 hour day.  Alas, I had a design team project due so I had to make something for this week's Stamp, Ink, Paper Challenge!


For my card I used a couple of different sets.  The background stitched rectangle is the Marbled Turnabout from Concord & 9th.  The heart die cut is from Hero Arts January 2018 My Monthly Hero Kit.  I love those kits because if you need a card really quick there is usually one I can pull out to put something together.


The card base was Stampin' Up! Flirty Flamingo.  The marbled layer was stamped with Flirty Flamingo, Blushing Bride, Powder Pink, and Primrose Petals (retired).  I also added a layer of versamark to the Primrose Petals turnabout so that I could clear emboss it.  It looks really cool in person.  The white stitched rectangle is Whisper White Cardstock.  The heart from the Hero Arts January 2018 kit was cut in Flirty Flamingo.  The sentiment was stamped on Flirty Flamingo with Primrose Petals and then clear embossed.  I added three PPP Clear Sparkling Confetti and added a few splatters with a Primrose Petals Marker to finish it off.  Although I threw this one together really quickly I do like how it turned out.  

Thanks so much for stopping by!  Blessings, Tina

Tuesday, August 7, 2018

Stamp, Ink, Paper #162 Stamp Layering with Concord & 9th Hi There Bear!

We're baaaaaacccckkkk!  Well Stamp, Ink, Paper is!  We finally took care of the technical difficulties to get back up and running!  What a fun challenge we have this week.... Stamp Layering!


Sometimes you need a quick card and Concord & 9th Hi There Bear really is a good choice for some quick stamp layering!


I don't know what it is about bears but I just love them.. brown bears, black bears, panda bears.. you name the bear, I love them!  I think this Hi There Bear bundle is an adorable set to use for a quick get well card.  The bear uses stamp layering as does the umbrella on this one.  I did just a little quick ink blending with distress inks for the background, stamped the sentiment, and added the stamp layered and die-cut bear and umbrella to finish it off.

Sometimes the simple things in life really are the best!  Thanks so much for stopping by!

Blessings, Tina

Tuesday, July 17, 2018

SIP #159 - Polkadots!


Hello and Happy Tuesday!  Do you love Polkadots?  If you do then this week's Stamp, Ink, Paper Challenge #159 is right up your alley!  Personally I love them!


I went soooo easy with this one that I'm a tad bit embarassed but not really!  LOL


This was such an easy card!  I layered some whisper white on an A2 Lovely Lipstick Card Base that had a piece of the 2018-2020 In Color 6x6 DSP Stack in Lovely Lipstick polka dots adhered to the front.  I ran a small piece of Whisper White ribbon (retired) around the front layered panels before glueing it down.  I added a Pearlized Doily over it with  Multipurpose liquid glue in the middle section.  I layered on a stitched Lovely Lipstick Circle and adhered to the doily with dimensionals.  On a scrap of Whisper White cardstock I stamped some of the flowers from the Love What You Do Stamp Set in Powder Pink on the background.  I stamped the sentiment from the same set over the flowers with Lovely Lipstick Ink and then cut out a smaller circle with the Circles Collection Framelits Dies and adhered it over the Lovely Lipstick Circle.  I finished it off with three Pearlized White Sequins.   I love when the patterned paper does most of the work for you!  

Thanks so much for stopping by!  Blessings, Tina


Product List

Tuesday, May 22, 2018

SIP #151 ABCs and 123s - Blend of Concord & 9th and Stampin Up! Stamp Sets


Hello and Happy Tuesday!  At some point Monday, I thought I might not survive work but here I am and I did!  lol  Hopefully Tuesday will be a much better day!  It's time for another Stamp, Ink, Paper Challenge.  This week's SIP Challenge is ABCs and 123s.

http://stampinkpaper.com/?p=4175

I decided to use my new Stampin' Up! Stamp Set for lettering called "Make A Difference".  It was one of the new stamp sets from the 2018-2019 SU catalog that I got on preorder and I love it!


If you follow my blog you know that I'm all over the place with my love of all things Stamping.  The big gorgeous rose (Painted Rose) is from Concord & 9th as is the fabulous background (Everyday Tintables Card Pack).  But my big surprise... is this new Stampin' Up! Make a Difference stamp set!  It is awesome!  So for this card I started out with my background by using Purple Tape to mask off rows on one of my Everyday Tintables Card Pack so that I could ink blend with Distress Ink every other double row.  I used Mustard Seed Distress Ink for the Ink blending.  Once I was happy with my stripes I cut the panel 4 1/4 x 5 1/2".  I had a beautiful sheer green scrap of ribbon that I tied around the panel prior to adhering to an Old Olive side folding A2 card base.  The outline of the painted rose was stamped with Versamark onto Watercolor Paper and heat embossed in white.  I watercolored with Distress Inks my focal Image.   Mustard Seed and Scattered Straw Distress Inks were used on the rose and Peeled Paint for the leaves. Once it was completely dry I also sponged a little of the same inks onto the rose and leaves to add more depth.  The coordinating die was used to cut it out and it was adhered with Dimensionals.  I snuck a partial piece of a SU White Pearlized Doily under the rose.  You can never go wrong with a hint of a Doily... right??  The Mom was created with the lettering from the Make A Difference Stamp Set in Old Olive on Whisper White Cardstock.  I cut it out with a Layering Oval Framelit and matted it with a Scalloped Old Olive Die Cut of the same set.  I finished this one off with 3 of the Sparking Clear Confetti from Pretty Pink Posh.

So back to that Make a Difference Stamp Set, not only does it have some gorgeous lettering and numbering choices but it also has some fabulous back of the card stamps for Handmade by, #Makeacard, #Sendacard, etc.  It is definitely worth checking out if you haven't already.  How cool is it to be able to stamp your address on the card, stamp any sentiment you want to put together, etc.  Sooooo much fun!  I'm a believer in this one!

Thanks so much for stopping by!  Blessings, Tina

Tuesday, May 8, 2018

SIP #149 Dads and Grads Challenge

Hello there!  I hope your week is off to an awesome start!  At least we survived Monday, right?  I have a friend that recently retired.   She said every night feels like Friday night and every day feels like Saturday... how cool that would be!!  I have a few more years to go but not too many.  Hopefully it will feel like that to me too!  I wonder if I'll craft every day??  I think I will!  :)

As usual Tuesdays always mean it's time for another Stamp, Ink, Paper Challenge!  This week's S.I.P. Challenge #149 is all about Dads & Grads!


I've been playing around with some of my Concord & 9th products from their April 2018 release.  I used the Sketched Stripes Background stamp on this one along with the Painted Rose Dies for the "thinking of you" sentiment.  For the DAD in the background I used Stampin' Up! Large Letters Framelits.  I haven't made an Eclipse Card in a while and felt like this was a good time to do so!


The sketched Stripes were stamped in Soft Suede and Chocolate Chip Ink onto Very Vanilla SU Cardstock.  I cut the panel out with a Lil' Inker Designs Stitched Rectangle Die.   I cut the DAD out with the Large Letters Framelits.  I also cut out 3 layers of the same letters in Early Espresso Cardstock to stack under the letters. All of the letters were adhered to each other with Tombow Multipurpose Glue.  I cut the "thinking of you" sentiment from the Painted Rose dies out in Early Espresso cardstock twice so I could stack them.  I adhered them over the DAD with more of the Tombow glue.   The front panel was matted on a larger panel of Soft Suede that was cut with a larger Stitched Rectangle die and then those were mounted onto a Dark Brown Woodgrain Card Base.

I love the way this turned out and I hope you do too.  Masculine cards don't have to be boring, right?
Thanks so much for stopping by!  Blessings, Tina

Tuesday, April 3, 2018

SIP #144 Birthday Challenge with Gina K Wreath Builder Bundle

Hello and Happy Tuesday!  Hope you had a great weekend and have survived Monday!  We have such a fun (and easy) challenge over at Stamp, Ink, Paper this week!  Who doesn't need birthday cards.. this is my kind of challenge! lol


I finally got my Gina K Wreath Builder Bundle!  It really is a LOT of fun!  I may have gone a little crazy with the Little Things Rainbow Gems by Lucy's Cards. 


Isn't it cute??  There are sooooo many options with the amazing wreath builder template.  I may be in my craft room for the next three days making wreaths!  

Thanks so much for stopping by!  Blessings, Tina

Tuesday, March 13, 2018

SIP #141 - Sketch Challenge with SU This Little Piggy

Hello and Happy Tuesday!  I hope you had a wonderful weekend and that your week is off to a fabulous start.  It was a messy rainy softball weekend for us.  We drove to Chattanooga to watch our sweet Taylor Rose play ball.  She loves softball so much and is really improving every year!  This was her first tournament this season and had a really good start!  Of course after my hubby, my kids and grandkids, scrapbooking and card making are definitely filling up my spare time.  This  week I'm back over at Stamp, Ink, Paper with a Design Team Card for this week's challenge.  

What a fun sketch right?  So many possibilities with this one!  I decided to finally use a stamp set that had never been inked up... This Little Piggy by Stampin' Up!  I've seen so many adorable cards with it so it's hard to believe I've never used it!


I stamped my adorable flying pig with SU Archival Black Ink onto Bristol Smooth Cardstock.  I love Bristol Smooth for light watercoloring where you aren't saturating the cardstock too much!  I used a watered down TH Distress Oxide in Spiced Marmalade and Picked Raspberry for my pig.  The wings were pretty watered down so they were a pale pink.  After the wings dried I used some Clear Wink of Stella to add some glittery shine to them.  I also used some watered down TH Peacock Feathers for the sky.. it was a very light wash.  After everything was dry I used SU Layering Square Framelits to cut it out as well as a black scallop tap and a larger layer of Powder Pink.  I used one of the Tutti-Frutti Cards as my card base.  I stamped the sentiment on the bottom with my Stamparatus to make sure that I got a good dark impression.  I have to tell you that I LOVE my Stamparatus.  At first I was a bit skeptical since I already had a Misti that I used most all of the time.  There are so many cool things you can do with the hinged lid that makes it an awesome value.  The stamping plates on the top and side are also very thick and make it easier to get a good dark stamped image.

Thanks so much for stopping by!  Blessings, Tina

Tuesday, March 6, 2018

SIP Challenge #140 - Four Legged Friends with Hero Arts Raining Cats & Dogs

Happy Happy Tuesday!  Is your week going well so far?  We've had soooo much rain lately but we did have a really nice weekend and nice weather on Saturday and Sunday.  We were so happy to see the sun!  Of course now, it's raining again but at least the two days of sun gave our lawn a chance to dry out a little bit!

Well you know it's Tuesday!  Time for another Stamp, Ink, Paper Challenge!  This week it's a Four Legged Friends Challenge and you know I'm all about dogs.. lol  I did throw in a cat for good measure!  I actually love cats too but our dogs don't. :(


I thought I'd do something I rarely do... make a shape card.  I used the Hero Arts Nesting Clouds Infinity Dies. This adorable stamp and die set as well as the Nesting Clouds Infinity Dies, were add ons for a My Monthly Hero Kit last year and the adorable rain stencil was part of the kit!


I love that the dogs have their tongues out... no doubt lapping up some of that rain that is coming down.  lol  I used 110# Neenah Classic Crest Solar White Cardstock for my card base.  I cut two of the cloud shapes out but I used my scoreboard to score a little line at the top of the back card to allow the top to swing open.  I used some Tombow Multipurpose Adhesive to adhere the top of the cloud panels together.  I cut another cloud out of Vellum and heat embossed the sentiment on it.  I used my rain mask and some Peacock Feathers Distress Ink and an Ink Blending Tool to add my rain.  I stamped my dogs and cat onto Bristol Smooth Cardstock with Versafine Black Onyx Ink and then clear embossed them.  I used my Zig Clean Color Real Brush Markers to color them and as you can see.. I didn't add a lot of color... just enough that they weren't completely plain.  I used my Plus Permanent Vellum Glue Tape Dispenser to adhere my vellum in a few places.  I'm really loving that it works pretty well and hardly shows.  I do try to cover up the adhesive when possible but it is more invisible than most adhesive for vellum.

Thanks so much for stopping by!  Blessings, Tina

Tuesday, October 31, 2017

SIP Challenge #123 Sketch Challenge with Smitten Mittens

Hello and Happy Tuesday!  Hopefully your week is off to a good start.  As usual on Tuesday I'm over at Stamp, Ink, Paper with my Challenge Card.  This week is an awesome sketch by the talented Dena Rekow!  I really love it and I'm sure you will too!


Of course I'm back on my mission to get more Christmas cards done so once again I took this chance to turn a sketch into one of my Christmas Cards.  I know that many of you make multiple of card designs.  I hardly ever do that.  I rarely duplicate any of my cards.  Weird.. well yep, I guess so!  It certainly takes me much longer to get my Christmas Cards done!  So this time I used the Smitten Mittens Bundle along with some of the Quilted Christmas DSP.


My color scheme was Real Red, Basic Black, Garden Green, and White which worked perfectly from  Quilted Christmas DSP.  The plaid banner behind the mitten was from the Christmas Around the World DSP.. I'm really loving plaids this year!

Here is a list of all of the products used:

Stampin' Up! Smitten Mittens Bundle
SU Real Red Cardstock
SU Basic Black Cardstock
SU Garden Green Cardstock
SU Whisper White Cardstock
SU Real Red Ink
SU Quilted Christmas DSP
SU Christmas Around the World DSP
SU Softly Falling Embossing Folder
SU Layering Circle Framelits Dies
Lil' Inker Stitched Rectangle Dies
Pretty Pink Posh Sparkling Clear Confetti

Thanks so much for stopping by!  Blessings, Tina

Tuesday, October 24, 2017

SIP Challenge #122 Product Feature - Washi Tape!

Hello and Happy Tuesday!  I hope your week has gotten off to a good start!  Jeff and I spent Saturday in Knoxville watching our sweet little granddaughter, Laken, play softball.  It was her only tournament this year and since I've seen her older sister play in several tournaments, I had to make this trip!  Oh and the good news was that they won their age bracket!  Here's a few shots that I couldn't help but share.. lol  it was a Halloween Tournament so they played in costumes.  Laken's team played as the Pink Ladies softball team from Grease!


It started off cool that morning and believe me by the end of the day it was time to peel that little jacket off!  lol  Laken is absolutely adorable and just as sweet as she is cute!

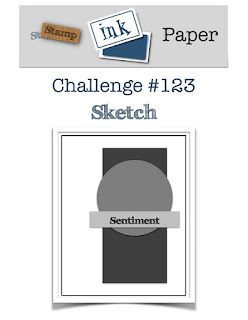
Well back to Tuesday and the matter at hand.  You know what Tuesday means, right?
It's time for another Stamp, Ink, Paper Challenge!  This week is all about Washi Tape


Since I had some Washi Tape with trains on it I decided to pull out the Classic Traveler Stamp Set along with Lovely as a Tree!  


Luckily I had been able to get the coordinating dies from Dies by Dave for the Traveler Stamp Set before he stopped selling them.  I will guard those with my life.. lol


Tip:  When using Washi  Tape over DSP or dark Cardstock, mount the Washi Tape on White Cardstock and then cut out around it.  It makes for a cleaner look and makes the Washi more stable.  I use snail to adhere the mounted Washi Tape to the DSP or Cardstock.   

Products used:

SU Traveler Stamp Set (retired)
SU Lovely As a Tree Stamp Set
Hero Arts Everyday Sayings Stamp Set (sentiment)
110# Neenah Classic Solar White Cardstock
SU Whisper White Cardstock
SU Basic Black Cardstock
SU Mossy Meadow Cardstock (retired)
SU Mossy Meadow Ink (retired)
Versafine Black Onyx Ink
Versamark Embossing Ink
SU White Embossing Powder
SU Wood Textures Designer Series Paper Stack
SU Layering Circle Framelits Dies
Dies by Dave dies for the Travler Stamp Set
Misc Train and Diagonal Stripe Washi Tape
FSJ Natural Twine
Misc Black Enamel Dots
SU Dimensionals

Tuesday, June 21, 2016

SIP Challenge #53 CASE The Designer

Hello and Happy Tuesday!   This week's challenge at  Stamp, Ink, Paper challenge is going to be so much fun!!  The theme is CASE the Designer.. just pick one of the design team cards and CASE it!  How awesome is that!


So here's my card for this week.  I hope you aren't tired of the Playful Palette DSP yet!  I had to use it again to pair with the Easel in the Painter's Palette stamp set to make a shaker card!


I started with a Basic Black 5 1/2" x 8 1/2" cardbase scored at 4 1/4".  I added a 5 1/4" x 4" layer of Emerald Envy cardstock and then a 5 1/8" x 3 7/8" piece of the Playful Palette DSP.  I stamped the easel in Archival Black Ink onto Very Vanilla cardstock and then fussy cut the outside of it.  I used one of the Layering Square Framelits to cut out the inside.  I used a larger size of the Square Framelits to cut out the window sheet and the piece of Very Vanilla that I stamped on.  The new thin foam strips are perfect for making shaker cards!  I added a few black seed beads and some small black Pretty Pink Posh sequins!  I layered my Washi Tape on Very Vanilla and fussy cut them out to use as my base for the easel.  I popped the two strips of Washi up with foam tape since the Shaker Easel had dimension from the foam strips.

I think I love the inside as much as the outside! 


Thanks so much for stopping by!  Blessings,  Tina