Thursday, October 29, 2015

October D's Stamping Team USA Giving Thanks Blog Hop


Hello!  Hope you have been having a wonderful week so far!  October's D's Stamping Team USA Blog Hop is all about Giving Thanks.  I hope you'll stop by everyone's blog to check out the inspiration!  If you've already been hopping you should have landed here from Deb Naylor's fabulous blog!  Deb was kind enough to join us this month as a guest hopper and we are so excited to have her!

I decided to make a flap card with the Thankful Friends Stamp Set.  Here's my Giving Thanks Blog Hop card

I just love the bear in this set.  He's so stinkin' cute!  For the sentiment, I used sponge daubers to add Cajun Craze, Chocolate Chip, Old Olive, and Hello Honey ink to my stamp.  

Here's the Inside of my card.


The next best thing to that super cute bear is that precious fox!  lol  For my sentiment on the inside of the card I used the Watercolor Words stamp set.  I really love the boldness of these sentiments!

Thanks so much for stopping by!  Please make sure to click the Next button and hop over to my friend, Megan Thompson's blog!  


Here are the Stampin' Up Products that I used:

Built for Free Using: My Stampin Blog

Tuesday, October 27, 2015

SIP #20 Color Challenge - You've Got This!

Hello and Happy Happy Tuesday!  I'm scheduling this post as by the time this one goes live, Jeff and I will be in Half Moon Cay, Bahamas.  I'm really looking forward to a vacation.  It's been a busy year and we haven't had a chance to chill out in some time!  

This week's Stamp, Ink, Paper Challenge is a color challenge!  I have always loved pinks and browns together and throw in a little bling and you have perfection!

When the Annual Catalog came out earlier in the year, I was on a "You've Got This" stamp set kick.  Well, here I go again.  Here's my take on this week's color challenge!

  
This week's card is a simple layered card.  I started with an 11" x 4 1/4" Early Espresso card base scored at 5 1/2".I added layers of the Blushing Bride DSP from the Subtles Background Collection first on my cardbase, and then another pattern mounted on more of the Early Espresso cardstock. I stamped my flower image from the You've Got This stamp set in Early Espresso on Whisper White.  I quickly cleared embossed the flower image and then watercolored  the flower in Blushing Bride Ink with Mossy Meadow and Old Olive for the stem and leaves.  I used gold stickles on the center of the flower and mounted the panel on more Early Espresso and popped it up on my card with dimensionals.  I added some Pretty Pink Posh gold sequins. I wanted a small sentiment for the outside so I used the "Thinking of You" portion of the sentiment that actually says "Thinking of You at Christmas" from the  White Christmas stamp set.  I used my banner punch to punch the end of the sentiment and adhered it with Dimensionals over some Gold Metallic Thread.  I added an Antique Gold Brad to the end of it.  This was a super simple card but really looks pretty.  Sometimes I need to remember that simple is not always a bad thing.  I tend to overthink my cards at times!  

Here are the Stampin' Up Products used:

Built for Free Using: My Stampin Blog


Non-Stampin' Up! Products:  Pretty Pink Posh Gold Sequins

Thanks so much for stopping by!  Blessings,  Tina

Tuesday, October 20, 2015

SIP Challenge #19 - Tic-Tac-Toe Halloween Card

Hello and Happy Tuesday!  Well since it's Tuesday, I'm back over at Stamp, Ink, Paper with my another card.  This week we have a Tic-Tac-Toe Challenge!  

For my card, I decided to go with the middle row accross: Black, Halloween, and Cat.  Here's what I came up with this week..


I made a Halloween Easel Card in Perfect Plum, Basic Black, and Very Vanilla.  I just love the new window from the Hearth and Home Framelits and the Cat from the Festive Fireside Framelits Dies is just so cute that I couldn't wait to use him (or her).  I even did a little faux embossing on the bottom of the black wall by cutting out a few more of the black cats and adhering them to the Basic Black Cardstock.  The upper part of the wall was Perfect Plum cardstock that was embossed using the Chevron embossing folder.  I rubbed the raised section of the embossing folder with Memento Tuxedo Black Ink before embossing it to give it a distressed look.  The window scene was sponged using Soft Sky, Tempting Turquoise, and Perfect Plum on Very Vanilla Cardstock.  I used a post-it note punched with a 1" circle punch as a mask for my moon.  I wanted to give it a hazy look and I think the combination of blue and plum really did that.  I used a 1/4 section of one of the Spider Web Doilies on the upper left portion of the window. My sentiment from the Happy Scenes Stamp Set was stamped in Perfect Plum on Very Vanilla and then backed with Perfect Plum Cardstock.  I cut banner ends with my Banner Punch.  The bottom of the easel card is Very Vanilla with a 3" strip of Happy Haunting DSP in Black and Very Vanilla polka dots on the bottom of the section.  The sentiment on the bottom is from the retired Mingle all the Way Stamp Set and was stamped in Memento Tuxedo Black on Very Vanilla.  I die cut the sentiment and used Dimensionals to pop it up on the Perfect Plum larger Die Cut.  This made a prop to hold my card up.  I really love the way it came out!

Here are the products I used: 


Built for Free Using: My Stampin Blog


Thanks so much for stopping by!  I hope you'll head over to SIP and link up a card of your own.

Blessings!
Tina

Thursday, October 15, 2015

Stampin Friends Halloween Blog Hop


Hello and welcome to the October Stampin Friends Blog Hop!  If you've been hopping already you should have landed here from Elizabeth's awesome blog!  If you missed it, make sure you click Previous to go back to check it out!!


As you probably know by now, this month's theme is Halloween!  How fun is that!  We are blessed to have two fabulous guest hoppers this month that you will definitely want to check out along the way:


If you've followed my blog, you'll know that I've been on an Owl kick lately.  Today's card is no different.. Here's my Halloween card...


I started with an A2 Basic Black card base.  My second layer was Pumpkin Pie Cardstock that was stamped tone-on-tone with the Watercolor Wash background stamp.  I used my Circles Collection Framelits to cut out the "moon".  Whisper 'White cardstock was sponged with Daffodil Delight Ink and some highlights of Pumpkin Pie ink to make my moon.  I then taped it behind the cut out and adhered the layer to the Basic Black cardbase.  I added a tree limb by punching out a black tree with the Tree Builder Punch.  I trimmed off the upper branch and then glued it to the left side of my card.  I added a Black Spiderweb Doily and my sentiment from an older set "Mingle all the Way" that was stamped on Whisper White and backed with a layer of Basic Black Cardstock.   My owl was cut out using The "Boo to You" framelits on Basic Black cardstock.  The owl's eyes were punched out with the Owl Builder Punch.  I handcut a little beak with Daffodil Delight cardstock.  
Here's a little closer view.

In keeping with the "Owl Theme" I made an Owl Treat Holder Fry Box


The owl's head was cut out with the Circles Collection Framelits.  I used a smaller Circle Punch to punch into the top of his head.  The white part of the eyes was Whisper White cardstock punched with the 1" circle punch.  The black of the eyes was punched form the Owl Builder Punch.  The front of the fry box was covered with Black and White Happy Haunting Washi Tape.  The wings were Circle Scallops that were cut and glued to the side of the fry box and then folded into the Owl's body.  I realize it's a little hard to see with the "Boo" tag but after having him all made I really thought he needed a tag.  I punched out a Note Tag and then cut out the "Boo" in Black Glimmer Paper from the "Boo To You" Framelits.  I added some Orange Ribbon and tied it with Basic Black twine.  I think he turned out really cute, maybe not scary but definitely cute!


I hope you've enjoyed my Halloween card and treat holder and are ready to click the next button to continue on to my good friend, Lisa Altman's blog!

Oh...but before you hit next, make a note of my favorite stamp set.. it's "Traveler" and then make sure you leave me a comment.  Once you've hopped all the way through and commented on everyone's blog, email Elizabeth at happystamper508@gmail.com and tell her you've commented and give her the name of all of our favorite stamp sets and she'll enter you in for a drawing of a $25 gift certificate for Stampin' Up!  Easy Peasy.. hope you win!

http://bluetricyclecrafts.blogspot.com/2015/10/stampin-friends-halloween-blog-hop.html


Just in case you got lost along the way, here's a list of all of the bloggers on this hop!
9.  Tina Riddle  - You are Here!!
10. Lisa Altman 


The Stampin' Up Products Used on my Card and Treat Holder are listed below:

Built for Free Using: My Stampin Blog


Thanks so much for stopping by!

Blessings,
Tina

Tuesday, October 13, 2015

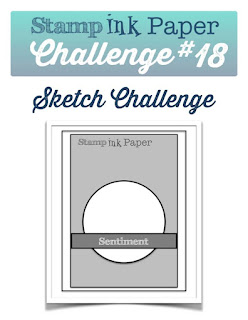
SIP Challenge #18 Sketch Challenge

Good Morning!  I hope you are having a great week so far!  It was a laid back weekend for me which is always good so that I can rest up for the work week.  Of course, I did manage to get a few cards made!  Since it is Tuesday, that means time for another Stamp, Ink, Paper Challenge and this week it's an awesome sketch!
http://www.stampinkpaper.com


There are so many possibilies with this sketch but the more I looked at it, the more I was convinced I needed that circle to be either a Sun or a Moon.  Since I am loving Daffodil Delight right now, I went with a sun!  lol    Here's what I ended up with...

Of course since I had trees stamped at the bottom of that layer,  I needed to turn the sketch upside down so that the sentiment was at the top.  I just adore my well loved Lovely as a Tree stamp set and it was perfect on this card.   I had recently seen a card on Pinterest that used this negative spotlighting technique thanks to my sweet friend, Shelley Glassco.  For a link to the Pin she sent me, click here  It's a super easy technique as once you stamp and then die cut the circle, you just stamp the same portion of the image on cardstock the same color as your base and line it up and then cut it to fit under your other stamped image. Once I had it lined up, I taped it down with Washi tape and then adhered it to my Chocolate Chip layer with Dimensionals.   It really gives the appearance that you had stamped the image on the base and the upper portion and that it just magically lined up.  Anyone that has stamped with me, knows that is an impossibility.  lol   I really wanted the grassline and hills on the tree line duplicated behind the trees so I used my Early Espresso Stampin' Write marker and just drew then in as close as possible to the hills on the stamp.  I'm actually pretty happy with how that turned out!  The Thank you sentiment on the banner was from my retired Definitely Dahlia stamp set.  I really liked the size and the boldness of the font on this one.  


On the inside layer, I added sentiment from another vintage set, Petite Pairs and then stamped some of the same trees on the lower left.  That was it for this card.  

Here are the current Stampin' Up! Items used:

Built for Free Using: My Stampin Blog


Thanks so much for stopping by!

Blessings,
Tina

Thursday, October 8, 2015

OSAT Blog Hop - Halloween/Fall


Hello and welcome to the October One Stamp At a Time Blog Hop!  It is such a blast to be able to participate in this awesome Hop with this super talented bunch of crafty Friends!  This month's theme is Halloween or Fall.  If you've been hopping already, you should have landed here from Dena Rekow's blog and by now already know the theme!  Dena is awesome so I'm sure you enjoyed her blog!

Since we have a Halloween or Fall theme going I thought it would be a great chance to get another Halloween card made for one of my sweet granddaughters.


Now I have to admit that I'm not always into the Halloween stamp sets but when I saw this adorable owl in the "Howl-o-ween Treat" stamp set, how could I possibly resist??  Not only is it such a great stamp set but it has coordinating framelits that you can purchase in a bundle... how cool is that???  I started out wanting to just use the owl but then those spiders were so cute I had to have a little spider/spider web action going on too!

Here's a closer view of the spider web.  That poor owl flew right into it!


I love that the coordinating "Boo To You" framelits have the word Boo in them!  I used some of the awesome Black Glimmer Paper for it and it really stands out!

Here's the inside of my card.  Just a simple sentiment from the same set and a couple of spiders stamped in the corner. :)


So as you can see, for my 3-D Project I decided to make a treat holder that would coordinate with the card.  Did I mention I love owls???


Here's a little closer view.  I used the Scallop Stripes Thinlit Die to cut Blackberry Bliss cardstock and then layered it over the Basic Black for the body.  My bone folder was used to curl the little scallops and then I reattached at just the top with Multipurpose glue.  


I hope you've enjoyed my projects and are ready for some more inspiration!  When you click the next button you'll have quite a treat because Terri Takashige is fabulous!  Enjoy!

In case you lose your way, here's a list of everyone on our Hop!  Make sure you stop by them all!

  1.  Maggie Mata
  2.  Elizabeth
  3.  Martie
  4.  Dena Rekow
  5.  Tina Riddle  (You are here!)
  6.  Terri Takashige 
  7.  Diane Squires     
  8.  Wynne 
  9.  AJ Bodine 
  10.  Megan 
  11.  Renee Ondrajka 
  12.  Raquelle Cliton 
  13.  Justin 
  14.  Lori Mueller 
  15. Jeanna Bohanon 
  16. Marisa Gunn 
  17. Andrea Tucker 
  18. Tenia Nelson
Here's a list of all of the Stampin' Up! Products used:

Built for Free Using: My Stampin Blog


Thanks so much for stopping by!

Blessings,
Tina

Wednesday, October 7, 2015

ICS Blog Hop - Fall for All


Hello and welcome to the October Inspire, Create & Share Blog Hop!  If you've already been hopping, you should have landed here from the super talented Jen Guarino's blog!  

I'm so happy that this month's ICS Blog Hop theme is "Fall for All"!  I just love Fall and it's finally beginning to feel like it here in Middle Tennessee!  One of my favorite things about Fall is the beautiful leaves changing colors.  With all of the trees around here it is a gorgeous sight for sure!

Here's my Fall for All card that is really all about the changing leaves!


My A2 card base was Early Espresso with a thin layer of Tangelo Twist and top layer of Old Olive Cardstock.  On the Old Olive layer I stamped some of the leaves from the Vintage Leaves stamp set tone on tone with Old Olive Ink.  For the colored leaves I used a fun technique called Joseph's Coat Technique that my friend Ginger Pelfrey shared with me a few weeks ago.  For a link to a video by Tami White on how to do this technique click here.  If you've not done this technique, I'm sure you'll love the video.  I sponged Cajun Craze, Tangelo Twist, Old Olive, Hello Honey, Daffodil Delight, and Soft Suede onto Whisper White Cardstock.  I then stamped my leaves onto the sponged cardstock with Versamark and embossed them with clear embossing powder.  Next I brayered Early Espresso ink all over my cardstock.  The leaves were then cut out with the Leaflet Framelit Dies and popped up with Stampin' Dimensionals.  I then splattered a little Early Espresso and Tangelo Twist Ink on my card.  (Yep, I went a little crazy with the splattering, maybe less is more...)


My sentiment from the Light Hearted Leaves Set was stamped in Early Espresso on Tangelo Twist cardstock and then clear embossed.  I die cut the sentiment with one of the Lots of Labels Framelit Dies and sponged the edge tone on tone with Tangelo Twist ink.  It was adhered to the card front with more Stampin' Dimensionals and a Candy Dot was added on each side of the label.


For the inside of the card I added a layer of Old Olive and then a layer of Crumb Cake.  I stamped one of the Vintage Leaves tone on tone with Crumb Cake Ink and then added the other sentiment from Lighthearted Leaves in Early Espresso over that.  I added the bottom part of one of my Joseph's Coat Leaves that had previously been cut for the top of the card onto the inside top edge.  I also did a little splattering of some of the Tangelo Twist ink on the inside of my card.  

I hope you've enjoyed my Fall for All card and are ready for some more inspiration!  Next up is the Fabulous Tammy Dunlap's blog!  Just click next button below and you'll be there!


Below are the products I used on my card:


Built for Free Using: My Stampin Blog


Thanks so much for stopping by!  Blessings, Tina

Tuesday, October 6, 2015

SIP Challenge #17 Floral

Good morning!  Hope you are having a fabulous week so far!  I just finished up a craft fair last weekend and I had a wonderful time, sold a lot of stuff and am soooo happy that it is behind me right now.  I may do another one the last weekend in November but at least I have a little down time!

This week's SIP Challenge is Floral.  How awesome is that???  I love love love flowers!
I made a card a couple of weeks ago for my sweet friend Ginger using a retired Our Craft Lounge set called Dandy Days.  On her card I used the dandelions but it had such a cool sentiment in the set that I knew I would want to use at a later time.  Here's my card with that super cool sentiment!  " I hope that we can we flowers in a world that sees weeds"... isn't that such a great sentiment! 

My A2 card base is Mossy Meadow cardstock.  My next layer is Soft Sky Cardstock.  I made a grass border in Mossy Meadow by using my Fringe Scissors.  I also cut back into some of the fringe with my Paper Snips to make it look a little more realistic.  My weeds and stems were cut from Mossy Meadow using a Woodland Branch die.  I cut three of the branches and then cut them into a two or three pieces per branch and adhered them to the bottom behind the grass.  The fence was cut in Smoky Slate Cardstock with my MFT Chicken Wire cutting plate.  I adhered just the edges to the Soft Sky layer with 2-Way Glue so that I could pull out some of the grass, weeds, and stems through the fencing. Ok, so I know that chicken wire runs the other way but I really wanted my card in landscape position so my chicken wire was apparently installed incorrectly by the fencing crew!  Just go with it!  lol  The Petite Petals flowers were stamped in Daffodil Delight onto Whisper White Cardstock and punched out with the coordinating Petite Petals Punch.  I curled the leaves with my Bone Folder to add some dimension and added a Rhinestone Jewel in the center of the flowers.  The flowers were attached using glue dots.   The sentiment was stamped in Mossy Meadow onto Whisper White and backed with Mossy Meadow Cardstock.  Both banner ends were cut with the Banner Triple Punch.  I really love the way it turned out and hope you did too.


Stampin' Up Products Used:


Built for Free Using: My Stampin Blog


Other Products Used:
MFT Chicken Wire Die
Memory Box Woodland Branch Die

Thanks so very much for stopping by!  Hope you'll head over to SIP
 and link up your own floral card!

Blessings, Tina