Tuesday, February 23, 2016

SIP Challenge #36 Card Maker's Choice


Hi everyone!  Hope your week has gotten off to an awesome start!  Today I'm back over at Stamp, Ink, Paper with my Design Team card for a Challenge that couldn't possibly be easier... Card Maker's Choice!  Well, how easy is that??  The hard part is deciding which of the awesome stamp sets to use!


Now here is where it gets real.... what stamp set do I use??   My three favorite Stampin' Up! Sets are Traveler, Hardwood, and World Map (I think... at least they seem to be) but I wanted to play with a set that I haven't had a chance to stamp with yet... Altenew Vintage Roses!  But you may have noticed that I did break out the Hardwood Stamp for the background!  


I also had the opportunity to use an embossing folder that I have been wanting to try out... Darice Basketweave!  All in all, this has been a fun cardmaking day!  My card base was a 11" x 4 1/4" piece of Daffodil Delight Cardstock.  I added a skinny layer of whisper white that measured 5 3/8 x 4 1/8".  My hardwood layer was a 5 1/2" x 4" piece of Sahara Sand stamped with Tip Top Taupe.  I sponged the edges with some Crumb Cake Ink as well.  A strip of white was added to the bottom with Tip Top Taupe Dotted Lace Trim secured to the back with Tear Tape.  My "basket" was a circle of Whisper White Cardstock that was dry embossed with the Darice Basketweave Embossing Folder.  I adhered it to the hardwood layer tucking the bottom just below the Lace strip.  My roses from the Altenew Vintage Roses stamp set were stamped with Daffodil Delight, Crushed Curry, Hello Honey and Delightful Dijon.  The leaves were stamped with Pear Pizzazz, Old Olive and Mossy Meadow.  I used the Altenew Vintage Roses Dies to cut out both my roses and my leaves.  Some of the roses and leaves were adhered with Tombow Multipurpose Glue and others were adhered with Stampin' Dimensionals.  I added a "Hugs" sentiment that was stamped in Tip Top Taupe onto Whisper White Cardstock and punched out with the retired Jewelry Tag Punch.  Last but not least, I added some Daffodil Delight Seam Binding around the lace layer and tied it in a bow in the front right side.  I'm not sure why I always want my bows tied on the right side, maybe because I'm right handed??  Do you have a preference??  Oh well, that's what I seem to do!  

Thanks so very much for stopping by!  Blessings, Tina

Stampin' Up Products Used (that are not retired):

Hardwood Stamp
Daffodil Delight Cardstock
Whisper White Cardstock
Sahara Sand Cardstock
Tip Top Taupe Dotted Lace Trim
Daffodil Delight Ink
Crushed Curry Ink
Hello Honey Ink
Delightful Dijon Ink
Tip Top Taupe Ink


Non - Stampin' Up Products Used:

Altenew Vintage Roses Stamp Set
Altenew Roses Dies
Darice Basketweave Embossing Folder

Tuesday, February 16, 2016

CYCI #107 Color Challenge

Hi everyone!  I'm over at Can You Case It with a card for their Color Challenge this week!  Here's the banner for the Challenge if you want to head over and link up one of your own!


For this one I wanted to use a stamp set that I love but hadn't ink up before.. Heartfelt Sympathy.  I just love the big font on these awesome sentiments.  

I decided to keep mine pretty simple because that gorgeous sentiment doesn't need a lot.  I just added a few more flowers on both sides. I really loved the color combination of White, Kraft and Purple!

Hope you are having a fabulous day!  Blessings,  Tina

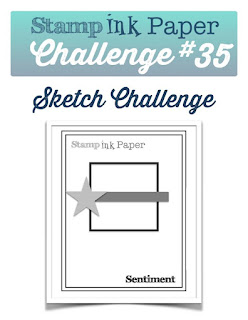
SIP #35 Sketch Challenge

Hello and Happy Tuesday!  I hope you had a wonderful weekend!  I made Jeff his very favorite soup on Valentine's Day!   It is an Italian Sausage, Bean and Pasta soup recipe and although it takes a while to cook it is definitely worth the wait!  I know you are probably over Love themed cards about now but I have one more to share with you!  Our Anniversary is four days after Valentine's Day so I had one more card to make.  This week's Stamp, Ink, Paper  challenge gave me plenty of inspiration!
Jeff's favorite hobby is fishing so I combined the Stampin' Up! By The Tide stamp set and Hardwood stamp with an awesome Gina Marie fishing stamp set (for the sentiment) and came up with this!


On This one I started with a 11" x 4 1/4" piece of Early Espresso cardstock that was scored at 5 1/2".  My next layer was Bermuda Bay cardstock that was stamped with the Hardwood stamp tone on tone with Bermuda Bay Ink.  I sponged some Crumb Cake ink to give the edges a weathered look.  My watercolored layer was 3" x 3 1/2".  I used the smooshing method to add Sahara Sand, Pear Pizzazz, and Bermuda Bay Ink to my watercolor paper.  Have you ever smooshed??  It's so simple.  I apply ink from the pad directly onto the a large acrylic block.  I'll use three different colors of ink in blocks of color on the block.   After applying the ink, I spritz it with water and then turn the block over and press it down to smoosh it onto the watercolor paper.  I allow to sit on the watercolor paper a few minutes.  After drying it with my heat tool, I rubbed on some Versamark ink on the bottom and then sprinkled heat and stick powder on top of that.  I then used my heat tool to heat it and make it sticky.  Then came something unexpected... Pink Himalayan Sea Salt was ground over the sticky heat and stick powder.  It turned out really cool and looks so much like sand!  I heat embossed the fish image with gold embossing powder and added some Pretty Pink Posh clear droplets.  My watercolored layer was matted with a 3 3/4" x 3 1/4" layer of Early Espresso and added to the Bermuda Bay hardwood layer with Stampin' Dimensionals.  I added a 1" x 3 1/2" strip of Early Espresso that had twine wrapped around it horizonally three times and knotted.   I stamped the Nantucket anchor emblem with Early Espresso Ink onto Very Vanilla cardstock.  Since I didn't have the right side of punch to punch that circle out I fussy cut it and then added a 1" circle of Early Espresso cardstock behind it to hide my terrible circle fussy cutting!  lol  The sentiment from the Gina Marie Fishing Stamp Set was stamped on Very Vanilla cardstock with Early Espresso Ink.  I added three Early Espresso Candy Dots to balance that layer out.   Jeff is such a fishing fan, I know he'll love it and he really is the best catch of my life!  

Stampin' Up Products Used:


Built for Free Using: My Stampin Blog


Non-Stampin' Up Products:

Pretty Pink Posh Clear Droplets
Gina Marie Fishing Stamp Set
Twine

Thanks so much for stopping by!  Blessings, Tina

Thursday, February 11, 2016

OSAT Blog Hop - Love is in the Air!


Hello and Welcome to the February One Stamp At A Time Blog Hop!  If you have already been hopping you should have landed here from the amazing blog of Maria Willis!  If you missed it, you will definitely want to make sure you check it out!  Maria has become one of my favorite card designers!  She has such a fresh and unique style that I really LOVE!  By now you probably already know that this Hop is all about Love!  I took this opportunity to make my sweet Hubby a Valentine's Card and a little treat box.   We've been trying to not eat as many sweets (we both have a sweet tooth!) so this is just the perfect size for a few chocolates and everyone needs a little chocolate for Valentine's Day! 

Here's my card and project!

And a close up of the card!

I can tell you that this card is much simpler than what I typically make.  I can't remember the last time I made a card that didn't have at least 3 full layers. lol  All that being said, I really like the way this turned out.  My cardbase was a 11" x 4 1/4" piece of Crumb Cake Cardstock scored at 5 1/2".  With my Sweetheart punch, I punched out Crumb Cake hearts and arranged them onto the base and adhered them with snail.  I then punched out more Crumb Cake hearts that I sponged with Crumb Cake Ink around the edges and adhered to the first layer of hearts to give them more dimension.  I added a Tea Lace Doily with snail and punched a 2 1/4" circle of Real Red Glimmer Paper and adhered to the middle of the doily.  I trimmed the Doily and circle at the left edge of the card.  I ran three loops of twine around the card front and tied it in the center of the circle.  The sentiment from the Groovy Love stamp set was stamped in Real Red Ink onto thick Whisper White Cardstock and then punched out with the Sweetheart Punch.  I sponged some Real Red Ink around the edges after punching and adhered over the circle and twine with Stampin' Dimensionals.     


For the inside of my card I stamped one of the larger hearts from the Groovy Love stamp set with Crumb Cake Ink that had first been stamped off to give it a more subtle look.  I added the Love You and My Valentine sentiments from the Bloomin' Love stamp set in Real Red.  To tie the inside to the outside I added a Red Glimmer Paper small sweetheart punch with a glue dot.  

Here's a better look at the Curvy Keepsake Treat Box..

I used Crumb Cake Cardstock to cut out my Curvy Keepsake Box.  I added a little bit of the Tea Lace Doily on both sides of the top.  The heart as well as the From My Heart sentiment were stamped on Thick Whisper White cardstock in Real Red ink.  The tag was cut from Thick Whisper White Cardstock as well.  The Love sentiment was also stamped in Real Red and the tag was attached to the treat box with twine.  I thought it turned out super cute.  

Next up is my sweet friend Megan Thompson's blog! Just click the next button and you'll be there!


Here's a full listing of our Bloggers in case you've lost your way!
  1. Eva Bussom 
  2. Pam Tetreault 
  3. Kelly Acheson 
  4. Martie Pollard 
  5. Wynne Grob 
  6. Elizabeth Jeanne 
  7. Renee Ondrajka  
  8. Alisa Tilsner 
  9. Maria Willis 
  10. Tina Riddle - You are here!!! 
  11. Megan Thompson 
  12. Melissa Davies 
  13. Sara Levin 
  14. AJ Bodine 
  15. Dena Rekow 
  16. Justin 
  17. Andrea Tracy-Tucker 
  18. Marisa Gunn 
  19. Anna Smith 
  20. Jeanna Bohanon 
  21.   Lori Mueller 

Here are the Stampin' Up Products used:
Built for Free Using: My Stampin Blog


Thanks so much for stopping by!  Blessings, Tina

Tuesday, February 9, 2016

SIP Challenge #34 Love

Hello all!  Hope you are having a great week!  We are having a little more snow here in Middle Tennessee but hopefully it won't cause the problems the last snow storm caused.  I am really looking forward to Spring!  This week it's a Love theme over at Stamp, Ink, Paper.  I hope you'll head over and check it out and then link up your own love themed card!


I'm sharing a Valentine's Day card I made for my youngest granddaughter, Laken.  It's a slider card and I know she will love sliding that cute little bear around and letting him flip over and over.  I admit I had a little fun sliding and flipping him over as well. :)  


This one started off with an A2 Thick Whisper White Cardstock base.  I layered a piece of Pink Pirouette onto Rose Red and ran them through my Big Shot with the retired Script Embossing Folder.  I used my Word Window Punch to punch out my slider tunnel.  To make the slider mechanism, you use two pennies with a dimensional sandwiched between them in the tunnel.  Then I placed a dimensional on the top penny before placing my little flipping bear on it. lol  I used the new Bear Hugs stamp set and coordinating framelits for my bears, hearts, and sentiment.  This was just a fun card and know Laken will have a lot of fun playing with it.

Built for Free Using: My Stampin Blog


Thanks so much for stopping by!  Blessings, Tina

Wednesday, February 3, 2016

ICS Blog Hop - It's a Love Thing


Hello!  Hope your February is starting off awesome!  I can't believe how quickly January just flew by!  Well of course since it is the first Wednesday of the month, it is time for another Inspire, Create, & Share Blog Hop and this month it's all about It's a Love Thing!  How fun is that??  If you have already been hopping you should have landed from the talented Tammy Dunlap's blog!  If you missed it, you'll definitely want to check it out!


I had so much fun inking up the Beautiful Ride Stamp Set from the Occasions Catalog!  On this card I stamped the car and couple images with Black Archival Ink onto Watercolor Paper and used my Aqua Painters and Stampin' Up! Ink Pads to color them in.  Obviously I did a little fussy cutting on them as well.  The sentiment was stamped on Whisper White cardstock with Black Archival Ink as well.  Both the floral DSP and the yellow crosshatch DSP are from Botanical Gardens Designer Series Paper Pack.   My Card base was Basic Black, with a layer of Mint Macaron cardstock.  

Next up is the fabulous Darla Roberts blog! Just click the next button and you'll be there! 


Here are the Stampin' Up Products used on my card today:


Built for Free Using: My Stampin Blog


Thanks so much for stopping by!  Blessings, Tina

Tuesday, February 2, 2016

SIP Challenge #33 Color Challenge with Market Fresh

Hello!  I hope your week is off to an awesome start!  I've had a few days where I've got a lot of needed craftiness done.  Now if I could just get some much needed housework done! lol 

Well of course it's Tuesday which means another Stamp, Ink, Paper Challenge!  This week we have an awesome color challenge for you!  

I wanted to use a set that I love but haven't had a chance to get much use out of... Market Fresh.  I love the Strawberry "Just Ripe for You" Image but it hadn't even been inked up yet.  Isn't it sad to have all of these great stamp sets and not enough time to use them all!  


I started off with a Very Vanilla A2 card base, layered with a 4" x 5 1/4" piece of the Farmer's Market DSP in a Very Vanilla and Black stripe. Next was a 4" x 3 1/4" piece of real red with a piece of Black Stitched Satin Ribbon around it and knotted to the left side.  My Strawberry image was stamped with Black Archival Ink onto Watercolor Paper and watercolored with Real Red, Pear Pizazz and Mossy Meadow.  I also stamped the image with Versamark onto Black Cardstock and heat embossed it with Gold Embossing Powder.  I then fussy cut the banner off of the embossed image and adhered it with Tombow Multipurpose glue onto the watercolored image.  I punched it out with a 2 1/2" circle punch and layered it behind a Basic Black Circle cut out with Little B's Pierced Circle Dies.  I adhered the circle layers with Stampin' Dimensionals and added some Pretty Pink Posh gold sequins.  I really love it and love that it's so different from most of my cards.  

Here is a list of the Stampin' Up Products used:


Built for Free Using: My Stampin Blog


Thanks so much for stopping by!  Blessings, Tina