Wednesday, November 30, 2016

PCC #221 - Color Layering Cardinal and Barnwood!

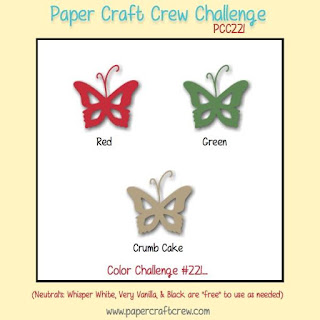
Hello and Happy Wednesday!  I hope your week has been going well!  I've been sick for a few days but I do believe the meds are kicking in!  Thank goodness!  I'm super excited about this week's Paper Craft Crew Challenge!  It's a color challenge that is perfect for Christmas and you know I still need to finish some of my Christmas cards!  


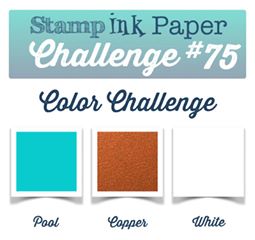
Why was I so excited about this color challenge??  Because I had purchased a brand new Concord & 9th Stamp called "Barnwood Background" from my friend Justin at the Stamp, Ink, Paper Store!  I don't know what Barns looks like around where you live but here in Middle Tennessee they are Red and usually have "See Rock City" painted on the roof!  


So... what color are Barns in your area?  I thought all barns were painted red but my husband told me that the Rock City folks painted the barns red as payment to paint their advertisement on the roof.  

Ok, so I knew I wanted to use the Barnwood Background Stamp with Red because in my mind, that's the color barns are.  lol  Then I remembered another awesome stamp set that I bought from the Stamp, Ink, Paper store.. Hero Arts Color Layering Cardinal!  So I combined the two and this is what I came up with.  I love it!


Ok, so let's get started with the scoop on this one.  I started with an 11 x 4 1/4" base, scored at 5 1/2" for a side folding card.  For the barnwood background, I stamped first in Versamark, and then in SU Real Red Ink and then stamped it on a piece of 5 x 3 3/4" SU Crumb Cake Cardstock.  I then sprinkled it with clear embossing powder and heat embossed it.  Next I stamped the limbs with SU Chocolate Chip Ink onto more of the Crumb Cake Cardstock.  I also stamped the Pine Sprigs onto Crumb Cake with SU Garden Green Ink.  I then cut all of these pieces out with the coordinating dies by Hero Arts and adhered them with 2-way glue onto the Barnwood layer.  The Cardinal was stamped onto Layering Weight Ivory cardstock by Gina K Designs.  The 1st layer was stamped with a light coat of SU Real Red Ink, the second layer was a heavier layer of SU Real Red Ink, and the third layer was stamped in SU Cherry Cobbler Ink.  The face mask layer was stamped in SU Archival Black Ink as were the feet.  I cut out the cardinal and feet with the coordinating dies.  I then attached the feet to the bird with fast fuse and then attached the Cardinal with foam dimensionals.  The "Peace" die was a freebie that I received from Taylored Expressions and it was cut from Gina K Designs Christmas Pine Cardstock.   I cut it out twice and glued the layers together for a bit more dimension and then added it with 2 way glue to the bottom of the stamped layer.  I then attached that layer to a 5 1/8" x 3 7/8" of Christmas Pine and then mounted that on my Real Red Card Base.  I love how it turned out and I hope you like it half as much as I did.  Thanks so much for stopping by!

Blessings, Tina

Tuesday, November 29, 2016

SIP Challenge #76 - Embossing!

Hello and Happy Tuesday!  I hope you had a wonderful Thanksgiving Holiday if you're from the States.  I had 5 glorious days off!  It was so wonderful and a much needed restful Holiday.   Well back to the matter at hand.... since it is Tuesday, I'm back over at Stamp, Ink, Paper with my take on a new Challenge.  This is all about embossing.. either heat embossing or dry embossing.  I love them both but I chose heat embossing this time.  

Here's my card showcasing a two fabulous stamp sets from Gina K Designs called Festive Foliage and Music Background Stamp. These are truly awesome sets!


I used Gina K Heavy Base Weight Ivory for my A2 cardbase.  My stamped layer was Gina K layering weight Ivory cut to 5 x 3 3/4".  I stamped the Musical background stamp onto the layering weight Ivory with Stampin' Up! Crumb Cake Ink.  After stamping it, I sponged the edges with more Crumb Cake Ink.  I heat embossed the Pine Images and the sentiment from the Festive Foliage Set with Gold Embossing Powder.  After heat embossing, I layered the stamped layer onto a 5 1/8" x 3 7/8" piece of Stampin' Up! Soft Suede Cardstock.  I ran some Natural Twine around the layered pieces a few times and attached a Twine Bow to it.  The layers were attached to the card base with foam tape.

Thanks so much for stopping by!  Blessings, Tina 

Wednesday, November 23, 2016

Paper Craft Crew Card Sketch #220 PCC220


Hello and Happy Wednesday!  Are you ready for Thanksgiving?  I hope so because you're running out of time!  Well if you are ready, why not head over to Paper Craft Crew and check out the awesome new sketch challenge??


I decided to play with a stamp set that I haven't been able to spend much time with.  It's a fun Lawn Fawn Set called Dad & Me.  Here's my card...


I knew this would come in handy as my hubby loves anything related to fishing!  

And since this fits the bill, I'm going to enter this card in the Watercooler Wednesday Masculine Theme Challenge!


Thanks so much for stopping by!  Blessings, Tina

Products used were:

Lawn Fawn Dad & Me  Stamp Set & Coordinating Dies
Neenah Crest Solar White 110# Cardstock
Basic Black SU Cardstock
Memento Tuxedo Black Ink
SU Soft Suede Ink (mountains and sentiment)
SU Marina Mist Ink (water)
SU Crushed Cucumber Ink (grass blades)
SU Stitched Shapes (squares)
Sponges with residual blue and green ink from previous use to lightly ink sky and ground
Copics
Plaid DSP, Washi Tape, Neutral Twine and Button from my stash

Tuesday, November 22, 2016

SIP #75 - Color Challenge!

Hello and Happy Tuesday!  I cannot believe that it is almost Thanksgiving!  This month has just flown by!  This year is not going to involve a lot of cooking for me.  Jeff and I will be meeting the kids and grand kids at Cracker Barrel on Wednesday night and will enjoy a low key Thanksgiving at home with the dogs this year!  Everyone has so many places to go and it just seems a bit easier this way!  I will cook a little Thursday but not the big feast that we usually have.  I envision a lot of relaxing and maybe I'll let Jeff beat me in a few games of Sorry!  lol

This week over at Stamp, Ink, Paper we have a color challenge!  I hope you'll head over and check it out!  It a great idea to take a little break from your festivities to make a card!  (I'm sure I'll do some of that too!)  Ok, so the colors are Pool, Copper, and White.. nice combo, right??


I hope you don't mind one more fall card.. I couldn't help it!  You see I just had to have the awesome Pumpkin Spice Stamp Set from Unity!  It was a stamp of the week a few weeks ago and I thought that since I wasn't a stamp of the week member that I couldn't order it.. well I was incorrect.  My friend, Ginger, told me she thought I could and she was right!  I was so super duper excited!!!
You see I am one of the crazies that just HAS to have a Pumpkin Spice Latte from Starbucks the moment I see the sign saying PSL's are back!  So how could I possibly resist this awesome stamp????


I received the stamp set a few days ago and couldn't possibly just put it up until next fall.. it was calling my name!  lol  I stamped the image with Memento Black Ink onto Whipped Cream FSJ Cardstock that I friend Eva sent me to try out.  I used Copics to color it in and then fussy cut it.  I used a 11" x 4 1/4" Heavy Base Weight White Cardstock as my base and scored it at 5 1/2".  I added a piece of DCWV Winter in the Woods Cardstock that was cut 5 1/4" x 4" and ran a piece of White Seam Binding around it before adhering it to the cardbase.  I folded one of my White Doodlebug Mini Doilies and glued it over the seam binding on the right side of the card.  I used a Unity Stamp Co. bow maker to tie my little seam binding bow that I glued to the left side.  For the life of me I can't seem to make a bow without this little thing!  I used Versamark Ink to stamp the sentiment in the upper left side and used some SU Copper Embossing Powder to emboss my sentiment.  I used Foam Tape to Adhere The Fussy Cut image onto the front and called it a day!  I hope you love it as much as I do!  Sometimes the simplest cards turn out to be my favorites!  

Thanks so much for stopping by!  Blessings, Tina

Wednesday, November 16, 2016

PCC Sketch Challenge #219 MFT YOU HAVE MY HEART

 Hi Friends!  I hope you are having a wonderful week!  This has been a hard week at the Riddle house as we lost one of our loving dogs, Snooki, this week.  It is never easy to deal with the loss of a pet and our dogs are family to us.  After a couple of pretty bad days, I finally got back into my craft room today to make a card for the Paper Craft Crew Sketch Challenge.  


Of course, I felt the need to make a dog card so I pulled out a super cute stamp set from My Favorite Things called "You Have My Heart".  


I was all over the board with the products that I used on this cute card... MFT Stamp set and dies, MFT Rounded Rectangle Dies, Bo Bunny 6x6" "Believe" paper, Stampin' Up! Soft Sky Cardstock, FSJ Butter Cream Cardstock, Stampin' Up! Black and White Twine, Doodlebug Design Sprinkles Enamel Dots, Doodlebug Limeade Mini Paper Doilies, FSJ Electric Lime Silk for the splatters, Memento Tuxedo Black Ink and various Copics for the coloring.  How is that for being all over the place??  I sure had fun pulling it together!   

Thanks so much for stopping by!  Blessings,  Tina

Tuesday, November 15, 2016

SIP Challenge #74 - CAS Christmas!

Hello and Happy Tuesday!  Hope you are having a wonderful week so far!  I am super duper excited about this week's Stamp, Ink, Paper Challenge!  For some reason, I am really getting in the Christmas Spirit and this week's challenge is a Clean & Simple Christmas Card!  This burst of Holiday spirit may be because I spent Friday night with my friend, Polly, making Christmas cards!  I believe I will actually have all of my cards made early this year! 


Well if you know me, you'll know that Clean and Simple is not my usual style but I really thought it would be fun to use one of the stamps from the Cookie-Cutter Christmas bundle so that's what I did!


I started with an 11" x 4 1/4" piece of Real Red Cardstock that was scored at 5 1/2" for a top fold card base.  On a piece of 4" x 5 1/4" Whisper White, I stamped one of the splatter stamps from Gorgeous Grunge in Crumb Cake Ink.  I found a piece of White and Red Washi tape in my stash that I adhered to another strip of Whisper White and then glued onto the splatter stamped portion of my white layer with Tombow Multipurpose Glue.  I then made several loops of the Red Metallic Thread from the Holiday Catalog and adhered it with a mini glue dot.  I stamped my Gingerbread Man from the Cookie-Cutter Christmas set in Soft Suede onto Crumb Cake Cardstock and punched him out.  Next the bow was stamped in Real Red onto a small scrap of Whisper White Cardstock and punched out and then adhered to the Gingerbread Man with a Dot of Tombow glue.  I adhered the Gingerbread man onto the Thread and Washi Tape with Stampin' Dimensionals.   I inked the sentiment up in Versamark Ink, and then in Real Red Ink and then clear embossed it with my heat tool.   Although this is not my typical style, I think it is super cute!  I hope you do too!

Thanks so much for stopping by!  Blessings, Tina


Product List

Thursday, November 10, 2016

OSAT Blog Hop - Let it Snow!


Hello Friends! I hope you are having a fabulous week!  It's hard to believe it's already the 2nd Thursday of the Month!  This month's One Stamp At A Time's Blog Hop is packed with Inspiration for our Let It Snow theme!  If you've already been hopping, you should have landed here from the fabulous blog of Renee Ondrajka and I'd like to thank you for continuing on!  If you have jumped on board with me you'll want to make sure that you visit all of the blogs by clicking the next button at the bottom of the post!  

So without further ado, here is my card and project for this month's hop...


I just adore the little Eskimo from the Cookie-Cutter Christmas stamp set so I combined it with the Snow Place Stamp Set to come up with this cute set!


I used the Softly Falling Embossing Folder for my Snow Background on Soft Sky Cardstock.  The Circle was cut with the Layering Circle Framelits.  After cutting the circle, I used my paper trimmer to slice the bottom off of it.  The Layering Oval Framelits were used to cut the door.  After the Igloo shape was formed, it was embossed with the Brick Wall Embossing Folder and then sponged with some Soft Sky Ink.  The Eskimo was stamped on Whisper White Cardstock with Memento Tuxedo Black Ink and colored in using Blender Pens with Sahara Sand, Soft Sky and Soft Suede ink for the clothing and Peekaboo Peach (lightly) on the face with Blushing Bride on the cheeks. The sentiment and Candy Cane are from the Snow Place stamp set.


The inside sentiment and snowflakes are also from the Snow Place Stamp Set.


I used the Curvy Keepsake Box to make my Igloo treat box.  The Eskimo was colored with blender pens just as it was on the card but I backed it with another punch for added stability.  For the flag attached to the candy cane, I used the Hardwood stamp in Sahara Sand on Whisper White cardstock and then stamped the sentiment from Snow Place with Soft Suede Ink.  I hand cut the banner end and then attached to the back of the candy cane with Tombow multipurpose glue.  I then glued the candy cane to the back of the Eskimo's hand and then attached it all with 2 layers of Dimensionals to the Curvy Keepsake box.  

Thanks so much for stopping by! To check out the awesome blog of my good friend, Megan Thompson, please click the Next button below!


Below is the entire Blog Hop list in case you've lost your way!

  1. Anna Smith
  2. Melissa Davies 
  3. Wynne Grob
  4. Kim Smith
  5. Kelly Acheson
  6. Kayla McGinnis
  7. Marisa Gunn
  8. Maria Willis
  9. Renee Ondrajka
  10. Tina Rackley Riddle - You are HERE!
  11. Megan Thompson
  12. Sara Levin
  13. Jeanna Bohanon
  14. Rick Adkins
  15. Lori Mueller
  16. Andrea Tracy-Tucker 
  17. Pam Staples
  18. Justin Krieger


Product List

Wednesday, November 9, 2016

PCC218 Tic-Tac-Toe Challenge!

Hello!  Happy Wednesday!  I'm back over with the Paper Craft Crew today with my version of this fun Tic-Tac-Toe Challenge.  


I decided to go straight down the third row with Embossing, Favorite Holiday Color (Red/Turquoise Combo) and Animal.  I pulled out a super fun set called Snow Place from last year's Christmas Catalog that returned to the Annual Catalog so yep, it's current, Yay!  


Some of the snowflakes in the background were heat embossed and some are snowflake sequins that I had in my stash.  I added a few white and iridescent sequins as well with my Fine Tip Glue Pen.  I also heat embossed with hill but running the Versamark pad over the hand cut slope and then pouring white embossing powder over it and then heating it until the entire piece was embossed.  I actually did this twice to get a better shiny white coating on it.   I just love the Red and Tempting Turquoise combination for Christmas.  

Thanks so much for stopping by!  Blessings, Tina


Product List

Tuesday, November 8, 2016

SIP Challenge #73 - Grateful


Hello and Happy Tuesday!  I just returned from a 7 day cruise and am super rested and ready to make this a great week!  We went to St Thomas, San Juan, Half Moon Cay, and Grand Turk!  Being grateful for the opportunity to go on a vacation to so many beautiful places made this week's Stamp, Ink, Paper theme absolutely perfect for me! 

I decided since my card fit the challenge that I'd also link it up in The Paper Player's Challenge Thankful Challenge!  It's always a good thing to Count your Blessings, right??


My first thought was to use the new Posies and Paisleys stamp set but then I decided to pull out a retired set from Last Year's Holiday Catalog called "Lighthearted Leaves". 


I started with a 5 1/2" x 8 1/2" piece of Wild Wasabi Cardstock, scored at 4 1/4" to make an A2 Cardbase.  My top layer was Watercolor Cardstock that measured 5" x 3 3/4".  I heat embossed the leaves from the Lighthearted Leaves stamp set with gold embossing powder.  I then used Real Red, Wild Wasabi, Pumpkin Pie, and Daffodil Delight Inks and my Aqua Painters to watercolor the leaves.  Once dried, it was backed with a 5 1/8" 3 7/8" piece of Real Read Cardstock.  and then mounted on the Card Base.  The sentiment (also from the Lighthearted Leaves set) was heat embossed in Gold on another small piece of watercolor paper.  I used my Layering Circle Framelits to cut it out and then backed it with a Real Red scallop circle cut from the same framelits.  I had some Gold Metallic trim that I looped and applied to the card front with Dimensionals and then added the sentiment over that.  
Here's a close up picture since it is hard to see the Gold embossing in the first photo...


Thanks so much for stopping by!  Blessings, Tina


Product List

Tuesday, November 1, 2016

SIP Challenge #72 - Sketch Challege!

Hello and a Very Happy Tuesday to you!  As you are reading this, I should be on a 7 day cruise to St Thomas, San Juan, Half Moon Cay, and Grand Turk.  I hope you are having half as good a week as I am!  LOL  This week over at Stamp, Ink, Paper we have a sketch challenge up!  Check it out!


Unfortunately I needed to make a couple of sympathy cards so I used this sketch for one of them.


My color palette is from the Petals & Paisleys DSP collection.  My card base is an 11" x 4 1/4" piece of Rich Razzleberry scored at 5 1/2".  My next layer is a 4 x 5 1/4" piece of Mint Macaron with a 2 3/4" x 5 1/4' piece of the Petals & Paisleys DSP on the left side.  My sentiment was stamped in a panel of Mint Macaron that was matted on Rich Razzleberry.  I stamped the trees in Delightful Dijon and the sentiment in Rich Razzleberry.  Both the trees and sentiment are from the Thoughtful Branches stamp set that was available in September.  It is an awesome set and I hope it makes it in the next annual catalog. 


The inside of the card has another sentiment and more trees from that same awesome stamp set! 

Thanks so much for stopping by!  Blessings, Tina