Wednesday, February 28, 2018

PCC #282 Tic-Tac-Toe Challenge with Stampin' Up Bubble Over Bundle!

Hello and Happy Hump Day!  We have officially made it half way through the work week!  That's a big Woo Hoo! for me!  My day job has been super stressful so I'm really happy to have evenings to craft!  Crafting really is my therapy but it I'm not sure about the saying that it is cheaper.  The person that said that must not buy as many craft supplies as I do!  lol

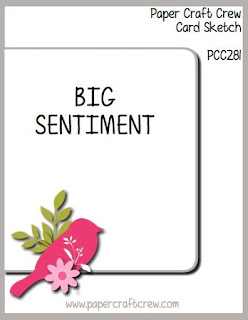
Well of course since it is Wednesday, it's time for another Paper Craft Crew Challenge.  This week's Design Team card is for this Tic-Tac-Toe Challenge.  


I chose to go straight across the bottom row with Lemon-Lime Twist, Vellum and Birthday!


I finally had the chance to play around with the Bubble Over Bundle.  It is so fun and I have to tell you that my favorite part of the bundle is the bottle caps that fit onto the bottles.  They look so realistic cut out in Silver Cardstock!   This was a super easy card to put together.  I used a Crumb Cake Card base and two layers of the coordinating Sale-a-bration Bubbles & Fizz DSP (free with a $50 purchase).  I added a layer of vellum over that to soften the busy background for the bottles.  Some loops of linen thread were attached with some Fast Fuse and the bottles (stamped in 2nd generation Lemon-Lime Twist and Soft Suede) were added with Dimensionals.  The outer labels for the brown bottles were cut in Basic Gray Cardstock and for the Lemon-Lime Twist Bottle the label was cut from Silver cardstock.  The inside of the labels for the brown bottles were cut from the bottle caps on the Bubbles & Fizz DSP.  The Birthday sentiment on the middle bottle was stamped in Archival Gray Ink onto Whisper White Cardstock.  After attaching the bottle tops cut out of silver cardstock, I added three to the lower portion of the card... maybe a few beers had been consumed!  lol  There is a list of the products used if interested.  Thanks for stopping by!  Blessings, Tina


Product List

Tuesday, February 27, 2018

SIP Challenge #139 - Ribbon with Concord & 9th New Release Products

Hello and Happy Tuesday!  I hope your week is off to a great start!  I had a wonderful weekend with some time hanging out with Jeff mixed in with some crafting time..... My favorite kind of weekend!

Well since it is Tuesday, that means another Stamp, Ink, Paper Challenge!


This is a super fun challenge that requires you to use ribbon.. super simple, right?

So this week's SIP card is all about the new Concord & 9th Feburary release!  Such fun products!  I used a combination of their new products on this fun card.


So first of all for the front panel, I used the Everyday Tintables Card Pack.  How fun these are!  It has emboss resist built into it!  To color mine, I used some ink blending with Distress Inks in Mustard Seed, Picked Raspberries, and Peacock Feathers.  Once I completed my blending I spritzed it with my Distress Water Spritzer.  I used a stitched rectangle die to cut out the panel and backed it with SU Basic Black Cardstock.  All of that was layered onto a card base SU Sparkling White Cardstock base that was scored for a top folding note card.   I used more of the Basic Black cardstock to cut out the "hey there" sentiment from the Concord & 9th Fabulous Phrases Dies.  I cut it out twice and used Multi Medium Matt adhesive to adhere to each other and then to the cardbase.  To add the retired SU ribbon, I used FastI decided some flowers coming in from the upper right would be pretty so I used the new Concord & 9th Wonderful Florals Bundle for the flowers and leaves.  I stamped them onto 110# Neenah Classic Crest Solar White cardstock and used my SU Blends to color them in.  I adhered them with Tombow Multipurpose glue and SU Dimensionals.  I finished it off by adding some Pretty Pink Posh Sparkling Clear Confetti!

Thanks so much for stopping by!  Blessings, Tina

Wednesday, February 21, 2018

PCC #281 Sketch Challenge with Concord & 9th Just Because Dies

Hello there!  It's Wednesday a.k.a. Hump Day again.. half way through to the weekend!  Yay!  I'm back over with the Paper Craft Crew today with my take on a sketch challenge.  


I loved this sketch!  Here's what I came up with...


Honestly if I hadn't done Ink Smooshing for the background there would have been no ink involved!  I used all dies for the card front!  It was the awesome Just Because Dies from Concord & 9th.  Of course I have the coordinating stamp set but I only used the dies!  I love the font of the because die!  The flowers and greenery are so super pretty.  I'm sure I'll use these a LOT!  

Thanks so much for stopping by!  Blessings, Tina

Tuesday, February 20, 2018

SIP #138 Card Maker's Choice with My Monthly Hero February 2018 Kit

Hello and Happy Tuesday!  Jeff and I had a wonderful anniversary weekend and honestly I hated for it to end.  But... all good things must come to an end and so do weekends! lol  Monday was back to work as was Tuesday but I did have a little crafty time because as usual Tuesday means it's time for another Stamp, Ink, Paper Design Team project!  This week is my very favorite challenge of all challenges..... Card Maker's Choice!  I have to chuckle at the Challenge Graphic since it says Make a card using your favoirte stamp set, ink colors and paper.  I mean seriously can anyone have a favorite?  I love them ALL!!  


Well I do have a favorite new set because I just received the February Hero Arts My Monthly Hero Kit and since Jeff and I love birds.. it's going to be a favorite for sure!


Since these birds are mostly sihouettes and not a lot of stamp detail, I decided to use the Baby Wipe Technique to achieve the muted colors.  I folded up some baby wipes and dotted on a few reinkers and used it as a stamp pad.   I love the blue and greens achieved in using this technique.  For the front panel, I used a piece of watercolor paper and used the distress ink smooshing technique to achieve the background.  The distress ink colors were Picked Raspberry, Peacock Feathers, and Mustard Seed.  It's a bit hard to see the yellow in the photograph since it's pretty light but in person it really looks pretty.  I stamped the  "Sending You Sunshine" sentiment from the kit in the upper right corner using SU Crushed Curry Ink.   I added the panel to one of the Dark Brown Woodgrain Card bases that was in the kit.  The cool bird's nest was from a die in the kit and was cut out in Crumb Cake cardstock and I sponged some Crumb Cake Ink onto it to add a little dimension and interest.  The limb was inked with markers so that I could achieve the green and brown exactly where I wanted them.  I used the coordinating die to cut out the limb and adhered it to the front panel with Tombow Multipurpose Glue.  I also adhered my bird's nest at the very top and very bottom with Tombow, allowing the middle slit to open so the birds could be tucked into the nest.  The bird on the left side as glued with Tombow and the bird on the right was adhered with a Dimensional.  I finished this with three SU Glitter Enamel Dots in Yellow.  This was fairly simple but so pretty.

Thanks so much for stopping by!   Blessings, Tina

Sunday, February 18, 2018

Scrapbook Sunday Blog Hop -Love Theme


Hello and Happy Sunday!  Can you believe it's already the 3rd Sunday of the month???  Well it is and that means it's time for another Scrapbook Sunday blog hop!  I'm so excited about being in this hop and among such fabulous scrapbookers!  It definitely makes me strive to be better!  If you've already been hopping thanks so much for continuing on.  If you're starting here, you'll definitely want to be sure you check out all of the inspiration by clicking the next button at the end of my blog post!


February's Scrapbook Sunday Blog Hop Theme is of course.. Love!  For me not only is February special but today is extra special because February 18th is my wedding anniversary!  Jeff and I are celebrating 10 years of marriage and they have been wonderful years full of love!


My layout today is definitely different from most that I do!   I never use so much white but today I wanted to try something a little different.  I used the Large Letters Framelits to cut out my X's and O's of Shimmery White cardstock.   I adhered them onto the left side of a 12" x 12" sheet of Whisper White Cardstock.   The little bit of shimmer gave it a very subtle contrast.   The 3" x 4" Love Big and Love Much card was from the Petal Passion Memories and More Card Pack.  I matted it with 3 1/4" x 4 1/4" Whisper White Cardstock.  I matted my 4" x 6" photos with 4 1/4" x 6 1/4" Basic Black Cardstock. I ran some of the awesome scalloped Marina Mist ribbon from the Sweet Soiree Embellishment Kit up to the bottom picture from the right side and then from the picture over a couple of inches on the other side with a diagonal cut at the end.  I adhered the ribbon with Tear Tape so it would hold well.   You'll notice that the bottom picture only had adhesive on the sides and bottom so that I could keep the top open for a hidden journaling tag under the picture.  


I hate my handwriting so the hidden tag is perfect for hiding it!  I'll cut a small slit with an exacto knife in my page protector sleeve so that the tag can slide out without having to remove the page.  I made the tag with a strip of 2" x 5" strip of Basic Black Cardstock.  I used the Scalloped Tag Topper punch to punch the top of the strip.  I ran some Basic Black Baker's Twine through the slot so that it can be pulled out easily.  I added some Whisper White cardstock to the bottom of the tag so that I could add my journaling with my new SU Journaling Pens... I love them!


The heart from the Sunshine Wishes Thinlits was cut from Watercolor Paper that had a very light wash with Soft Sky ink.  Once dry I added a very more splashes of Soft Sky ink. I adhered it by dotting small dots of Tombow Multipurpose Glue onto the back of it.   I cut the "amazing" from the Celebrate You Thinlits out of a scrap piece of Marina Mist cardstock.  The amazing was glued over the heart with Tombow Multipurpose Glue as well.   I used my Stampin' Write Markers to make some splatters of both Marina Mist and Basic Black.  Do you do that too?  You just pull out the brush end of the marker really fast running against the side of the top when you pull it out to make it splatter.  I may have gone just a little splatter crazy!  I finished it off whith a few of the Glitter Enamel Dots.

Thanks so much for stopping by!  If you are interested in any of the Stampin' Up! products used, the listing of all products will be after the Blog Roll.  Make sure you click the next button to check what fabulous inspiration lies ahead at the Super Cool Blog of Cheryll Miller!


Blog Roll:

Tina Riddle - You are here!


Product List

Tuesday, February 13, 2018

SIP #137- Tic Tac Challenge SU Jar of Love

Hello and Happy Tuesday!  Are you having a wonderful week so far?  I sure hope so.  I'm soooo ready for warm weather so once again my card has flowers.  Do we feel a theme here?  lol  Today I'm back over with the rest of the Design Team at Stamp, Ink, Paper with a card for a new Tic-Tac-Toe Challenge. Here's the Challenge Graphic for you to check out...


I went straight accross the bottom row with Punch, Woodgrain and Embossing! 


First of all, how cool are punches... I mean really they are awesome!  So I have to tell you that one of my favorite new punches is the Tailored Tag Punch!  It is fabulous with the True Gentleman Suite  but as you see here.. there are soooooooo many possibilities!  I used the Jar of Love Stamp and Everyday Jar Framelits to create this card.  The "Hello" sentiment from the Everyday Jar Framelits fit perfectly in the middle of this punch!  Of course I heat embossed the sentiment first in Gold and then punched it out so that it lined up perfectly!  My flowers from the set were stamped in Peekaboo Peach and Calypso Coral (full strength and stamped off).  The leaves were Emerald Envy.  I think Emerald Envy is my new favorite green!  I also added a small die cut in gold mirror cardstock that peeked out the left side.  I added three small sequins and finished them off with a small pearl inside each of the sequins.  I adhered my flowers and punch onto a panel of the Wood Textures DSP stack.  My card base was one of the Tutti Frutty Card Bases and Envelopes in Calyso Coral.  

Thanks so much for stopping by!  Blessings, Tina

Thursday, February 8, 2018

OSAT Blog Hop - Don't Go Breaking My Heart


Hello and Welcome to the February OSAT Blog Hop.  If you've already been hopping then you know we are riding along with a Love theme this month a.k.a. Don't Go Breaking My Heart!  Honestly.. February really is the month of love, right?  Not only is the 14th Valentine's Day but February 18th is my Anniversary!  Jeff and I will be celebrating our 10th Anniversary this year and it seems like it has really just flown by!  I think the saying goes "Time flies when you're having fun".. well we certainly have been having a lot of fun.  It is certainly nice to have a wonderful life partner!

Well back to the Hop at hand....I really wanted to use something out of the Annual Catalog for my card and after doing a quick inventory of my stamps, it seemed a hands down decision to use the Lift Me Up Stamp Set and the Up and Away Thinlits Dies!


I went simple with my color scheme.. Real Red, Pacific Point, Soft Sky, and Whsiper White.


Here's the front of the box with the card.. I wanted to add a tag but with the tag on the front, it hides the "Love You" oval so I added the tag to the other side.


I felt like the color combination and the addition of the striped ribbon to the box made it feel a bit more masculine.  

Thanks so much for stopping by!  Please make sure to stop by all of blogs for lots of inspiration.  If you are interested in any of the products used, I'll have links below the Blog Roll!  

Blessings, Tina


Product List

Wednesday, February 7, 2018

PCC #279 Inspiration Challenge with Stampin' Up! Beautiful Peacock

Hello and Happy Hump Day!  What a week it's been so far for me.. work week that is.  I've been working a lot of hours over the last month or so and this old gal is getting tired! lol   I've told myself that I'm retiring in 4 years.. I hope I haven't been fooling myself.  I really need more crafting time!

This week over at Paper Craft Crew we have an Inspiration Challenge.  What do you think of when you see this Challenge Graphic??


So when I saw the Challenge Graphic, the first thing I thought of was Feathers.. but I didn't really have a current feather stamp and didn't want to pull out something retired.  One of my new resolutions is to try my best to use current product!  As I was looking through some of my stamp sets I realized that the Peacock would work perfectly for this one!  


I learned so many things while making this card.. lol  First of all, I realized that if I had stamped the Peacock higher I could have had it standing on the "celebrate" die cut.. that would have been awesome.  Also, I realized that since I didn't stamp it that way and since I wanted to sponge the bottom, I should have sponged prior to embossing the bottom portion because the Smoky Slate ink really did make the gold embossing a little dull.  I tried to wipe it with a paper towel to remove the ink sitting on the embossed part but it didn't really do a great job.  So .. you have the awesome opportunity to learn from my mistakes.  

Thanks so much for stopping by.  Blessings, Tina

Below is a list of the items used.  Both the Beautiful Peacock and Celebrate you Thinlit Dies are Free Sale-a-bration Items that you can earn with a purchase!


Product List
<!-------- TAMS End -------

Tuesday, February 6, 2018

SIP #136 - Cabin Fever with Concord & 9th Sunshine Turnabout Stamp

Hello and Happy Tuesday!  I sure hope your week is off to a wonderful start!  There are sooo many sick people here in Tennessee!  One of my best friends has the flu and some of the schools have even closed for a few days because of sickness and especially the flu!  I hope you are staying well.. washing your hands and trying to stay away from sick people.  I know that's easier said than done!  This week's challenge over at Stamp, Ink, Paper is one I'm really feeling.. Cabin Fever!  We are all ready for Spring I think and ready to thaw out!  


So when I think of Cabin Fever, I think of getting outside in Sunshine.. so that brought me to a fun stamp and die set by Concord & 9th that I have hardly used.. Sunshine Turnabout!  


I used Stampin' Up Inks to ink up the fun turnabout stamp in Peekaboo Peach, Daffodil Delight, and the retired Strawberry Slush in both full strength and stamped off.  I used some circle dies to cut out my Sunshine rays.  The center was cut from Peekaboo Peach Cardstock.  I stamped the sentiment "you make everything shine" in Peekaboo Peach Ink twice and then stamped versamark over it and clear heat embossed it.  Since I felt like the embossed sentiment looked more orange than peach, I used a strap piece of SU Pumpkin Pie cardstock to cut out the scallop to surround the circle.  The flowers were stamped on Whisper White with the same colors that I used for my turnabout stamp and the leaves were stamped in SU Wild Wasabi.  I used the coordinating dies to cut out the flowers and leaves and arranged them around the sentiment.   I really felt like this stamped panel was calling for a square card so I cut a piece of Thick Whisper White Cardstock 8 1/2 " 4 1/4" and scored it at 4 1/4" for a small square card.  I cut a piece of watercolor look pink patterned paper from Altenew 4 1/4" x 4 1/4" and used Tombow to adhere it completely to the front of my card base.  I ran a piece of white organza ribbon across the front and tied it in a bow on the far left of the card.  I attached my circle with Dimensionals over the ribbon. Two of the flowers had glittered enamel dots by Stampin' up! as centers.  The other flowers had Lucy's Little Things Rainbow Jewels as centers.  I finished the card off by adding a few more of the Rainbow Jewels onto the card front with Ranger Multi Medium Matt Adhesive.   I'm loving the square card.. I see more of these in my future!

Thanks so much for stopping by!  Blessings, Tina