Wednesday, January 29, 2020

PCC368 Sketch Challenge with Stampin' Up! Lovely Lily Pad

Hello and Happy Hump Day!  I'm back with another Design Team card for The Paper Craft Crew Sketch Challenge #PCC368!


Today's sketch was a fun chance to use the beautiful Sale-a-Bration Freebies.... Lovely Lily Pad Stamp Set, Lily Impressions Designer Series Paper, and the Lily Pad Dies!


I absolutely adore this gorgeous Lily Impressions DSP!   It has the most gorgeous images and colors!  I used Pretty Peacock as my cardbase color and Flirty Flamingo to matt my layers of DSP.  Both sides of the same sheet of paper were used in this card.  Side A  was used for the background panel and side B for the stitched square panel.  The Lovely Lily Pad stamps were stamped with Versamark onto Thick Whisper White Cardstock and heat embossed in White.  I used an ink blending tool to blend the Flirty Flamingo and Garden Green Ink onto the stamped images and used the coordinating dies to cut the images out.  I added a little darker pink Stampin' Blend marker to some of the ink blended areas to add a little contrast.  This card is so pretty and was really easy to create!  

Thanks so much for stopping by!  Blessings, Tina

Wednesday, January 22, 2020

PCC367 - Inspiration Challenge - Romantic Moments

Hello and Happy Hump Day!  It's time for another Paper Craft Crew Challenge and this week we have a Inspiration Photo for you.


I thought since my anniversary is coming up on February the 18th, that I would make an Anniversary Card for Jeff.  I thought Jeff would appreciate the non-traditional colors on this one.


I decided to go with a tone-on-tone of Gray Granite for the background and cardbase. I used the new Sale-a-bration Stone 3-D embossing folder that is part of the Power of Hope Bundle that is available for free with $100 purchase.  I used a sponge and inked the edges of the stone embossed layer with more of the Gray Granite Ink for a little dimension and interest.   I heat embossed the sentiment from the Peaceful Moments Stamp Set in black onto Thick Whisper White cardstock.  I used the wreath die from the Painted Labels Dies (part of the Painted Poppies Bundle) to cut it out.  i stamped the Poppies from the Painted Poppies Bundle onto more of the Thick Whisper Whtie cardstock and used Pool Party and Old Olive Stampin' Blends to color them in.  I popped both the wreath and the flowers up with Dimensionals and tucked the leaves under the flowers adhering with Multipurpose glue.  I added a small bow of twine to the lower left side of the wreath and finished it off with three of the Gold Glimmer Enamel Dots.  I LOVE the simplicity of this card and I know that Jeff will too!

Thanks so much for stopping by!  Blessings, Tina

Sunday, January 19, 2020

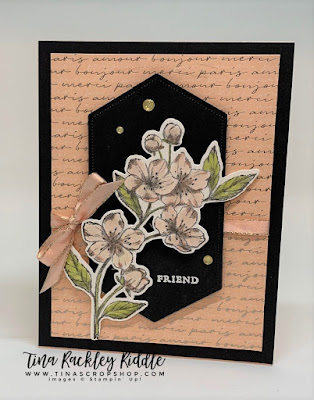
Stampin' Up! Forever Blossoms Bundle paired with Parisian Blossoms Specialty DSP

Hello and Happy Sunday! It's game day in the Riddle Household.. Tennessee Titans are taking on the Kansas City Chiefs and we are ready to Titan Up!  So while I'm waiting for the game to start, I might as well as do a little crafting, right?

So I finally got the beautiful Forever Blossoms Bundle and I LOVE it!  The shading on the blossoms is so beautiful and makes the coloring so easy!  Do you know what else I love???  ... The Parisian Blossoms Specialty DSP.  It is absolutely gorgeous!!!


This Specialty DSP is just so elegant as a backdrop for this beautiful blossom!  

I decided to use this as a birthday card because I'm always needing them!  Here's a quick peek at the inside....


Thanks so much for stopping by!   Blessings, Tina

Saturday, January 18, 2020

The Gangs All Meer Birthday Card

Hellooooo weekend!  I'm so happy for a lazy Saturday morning.  Jeff and I will be meeting my son, Wayne and his boys for his Birthday dinner later today!  I did some searching for Masculine cards on Pinterest this morning and after looking at quite a few of them, I decided I could come up with something on my own just as well.  I think if Wayne liked to fish, or golf, or hunt, it would be easier!  Ugh!  I looked through some of my newer stamp sets and decided to use the Gangs All Meer Stamp Set.  I guess cute little animals will work for any birthday!  


I stamped thse three adorable little images in a row using Versafine Black Ink because it's waterproof.  I used my ink pads and Aqua Painter to watercolor the picture in.  The ink colors used were Granny Apple Green, Daffodil Delight, Basic Gray, Gray Granite, Soft Suede, and Pool Party.  As you'll notice I cut my Happy Birthday to a Standup Friend sentiment into two pieces so I could just use the Happy Birthday.  I used a Black Stampin' Write Marker to connect the ground once the watercolor panel dried.  I backed it with a thin matt of Soft Suede Cardstock and then ran some twine around the bottom of the panel. I stamped the hate on a scrap of cardstock and fussy cut it to fit on the cute little Meercat's head.   I found some aztec-look retired DSP and used it for a background on my Soft Suede Cardbase.  I loved the way that it turned out.  

Now for the inside....


I kept the inside really simple by stamping the little cactus in the lower right corner.  I used Memento Tuxedo Black Ink and used my stampin' Blends to color it in.  This will leave me lots of room to write a personal message.

Thanks so much for stopping by!  Blessings, Tina

Wednesday, January 15, 2020

PCC366 Paper Craft Crew Sketch Challenge with Stampin' Up! Free as a Bird

Hello and Happy Wednesday!  I've have been MIA with the Paper Craft Crew for a while now but I'm back and ready to dive in with a fun sketch challenge and the Free as a Bird stamp set from the Annual Catalog!  


I have to admit.. I really am a bird person.  Whenever my hubby and I go on vacation, I'm always taking pictures of birds.  My card idea started with a piece of Purple Posy Cardstock but I had to admit that I wasn't sure if there were many birds that were lavender or purple.  So... of course I googled purple birds and found out that there are! 


This little guy looked a lot like the little birds in the Free as a Bird stamp set so I went for it!


I used the floral and leaf images from the stamp set to make a background by stamping them with Versamark for a tone-on-tone look.  I used one of the Stampin' Up! Stitched Rectangle Dies to cut it into my background panel.  I layered that on a piece of Basic Black Cardstock and then adhered it to a Melon Mambo Cardstock.  I then stamped the birds on a branch image onto a piece of Bristol Smooth Cardstock with Gina K Designs Amalgam Ink and colored it with Zig Clean Color Markers.  The Bristol Smooth really allows the Zig Clean Color Markers to blend and it takes water really well.  Once the image was dry, I used one of the Stampin' Up! Stitched Nested Label Dies to cut it out.  *Currently The Stitched Nested Label Dies can be purchased with the Free as a Bird Stamp Set as a bundle! I used Stampin' Dimensionals to adhere to the layered card base.  I stamped the "hello" sentiment from the set with Versamark Ink onto Basic Black cardstock and heat embossed with White Embossing Powder.  I used Multipurpose adhesive to adhere the sentiment to the bird label die.  I added a Mini Dimensional to the left side that hung off of the label so support it.  Finally I added some Gold Glitter Enamel Dots that had been colored with a Melon Mambo Stampin' Blend and adhered them to the front of the card.  The Stampin' Blend alcohol markers dry so quickly that you can add them almost immediately to your card. 


Product List

Friday, January 10, 2020

Honey Bee Bundle Stampin' Up! Again!

Hello and Happy Friyay!  Yep, it's Friday and it's pay day so it's definitely a Friyay!  
I have another card to share with the adorable Stampin' Up! Honey Bee Bundle! and Golden Honey Specialty DSP!  I hope you love it as much as I do!


Here's the outside of the card which came together soooo easily!  I have an 11" x 4 1/4" inch Basic Black Cardbase scored at 5 1/2" for a top folding card.  I added a panel of the gorgeous Golden Honey Specialty DSP (free during sale-a-bration with a $50 purchase!) that was cut with one of the stitched rectangle dies.  I stamped the honey bees on whisper white cardstock with Memento Tuxedo Black Ink and then colored in the yellow with Daffodil Delight Stampin' Blends!  I used the coordinating dies to cut out the honey bees and then added a little clear Wink of Stella to the winks for some shine.  I stamped the sentiment with more of the Memento Tuxedo Black ink onto Whsiper White Cardstock and cut it with one of the Stitched Nested Label Dies.  I used a scrap of more of the Golden Honey Special DSP (black and gold stripe) to cut the little gold stripe that I adhered to my card panel prior to adding the sentiment die cut with dimensionals.  I love how the gold looks layered under it!  Finally I added 3 gold glitter enamel dots and a scrap of Black and Gold Twine to finish off the outside of my card.


Here's a look at the inside of my card.  I stamped the sentiment onto a stitched rectangle Whisper White panel and adhered it to the middle of the inside.  I stamped the honey bee onto a scrap of Whisper White with Memento Tuxedo Black Ink and colored with my Daffodil Delight Stampin' Blends as I did the other honey bees.  I added some clear Wink of Stella to the center under the sentiment with Tombow Multipurpose Adhesive. 

Thanks so much for stopping by!  Blessings, Tina


Product List