Tuesday, June 28, 2016

SIP Challenge #54 Color Challenge!

Hello and welcome to Stamp, Ink, Paper's Challenge #54!  I came very close to not getting this post done this week.  You see I usually make my card for Tuesday's post on Sunday afternoon but my newest little granddaughter decided to be born on Sunday instead of the planned Tuesday!  My husband and I drove from our home in Manchester, TN to Knoxville, TN on Saturday to help my daughter get some last minute things done.  We returned late Saturday night so the plan on Sunday was to get some rest and make my card.  Sunday morning as I poured my first cup of coffee my daughter called to let me know that she was in labor.  Well I put my coffee down and off we went, back to Knoxville!  Here's a picture right after Blakely Addison Rose was born :)

  
And here is one from this morning :) Isn't she gorgeous!


I'm back and home now and made about the quickest card ever!  This week's challenge are some yummy colors.. I hope you'll head over and check out all of the inspiration!


Here's my card..


I used an Old Olive 11" x 4 1/4" sheet of card stock that was scored at 5 1/2".  I added a thin 5 3/8" x 4 1/8" sheet of Tangerine Tango cardstock and then some awesome printed cardstock that I bought at Old Time Pottery.  The name of the stack is DCWV Fiesta Forever Stack.  It is a 48 sheet pack of 12x12" printed cardstock for only $6.99 and it has some awesome patterns.  The stamp set I used was Unity Stamp Co. "Swagger".  I just love that little chick!  I stamped his on Whisper White Cardstock and then again onto a another piece of the Fiesta printed cardstock pack in yellow.  I fussy cut just the chick body out of the yellow printed cardstock and glued it over the stamped image on the Whisper White Cardstock.  I colored in the ground with an Olive Green Alcohol Marker (actually it was one of the retired Blendabilites from Stampin' Up!)  I colored in the beak with an orange marker and the hearts with a Red Alcohol Marker.  I used MFT stitched circles to cut out the ship and the Olive Green Circle Mat.    I heat embossed the sentiment in White on the Tangerine Tango Cardstock and cut it out with the same stitched circle die as well as the mat for it.  The top layers of the circles were attached to the mats with Snail and then attached to the Card with Dimensionals!

Thanks so much for stopping by!  Blessings, Tina


Tuesday, June 21, 2016

SIP Challenge #53 CASE The Designer

Hello and Happy Tuesday!   This week's challenge at  Stamp, Ink, Paper challenge is going to be so much fun!!  The theme is CASE the Designer.. just pick one of the design team cards and CASE it!  How awesome is that!


So here's my card for this week.  I hope you aren't tired of the Playful Palette DSP yet!  I had to use it again to pair with the Easel in the Painter's Palette stamp set to make a shaker card!


I started with a Basic Black 5 1/2" x 8 1/2" cardbase scored at 4 1/4".  I added a 5 1/4" x 4" layer of Emerald Envy cardstock and then a 5 1/8" x 3 7/8" piece of the Playful Palette DSP.  I stamped the easel in Archival Black Ink onto Very Vanilla cardstock and then fussy cut the outside of it.  I used one of the Layering Square Framelits to cut out the inside.  I used a larger size of the Square Framelits to cut out the window sheet and the piece of Very Vanilla that I stamped on.  The new thin foam strips are perfect for making shaker cards!  I added a few black seed beads and some small black Pretty Pink Posh sequins!  I layered my Washi Tape on Very Vanilla and fussy cut them out to use as my base for the easel.  I popped the two strips of Washi up with foam tape since the Shaker Easel had dimension from the foam strips.

I think I love the inside as much as the outside! 


Thanks so much for stopping by!  Blessings,  Tina

Tuesday, June 14, 2016

SIP #52ND CHALLENGE BLOG HOP!

Did you hear the big news???  We are celebrating our One year anniversary over at Stamp, Ink, Paper!  I have no idea how it could possibly be one year since the SIP Challenge Blog started.  The year has flown by! We've had a blast creating and seeing all of your creations every week!   By now you may know that we are also having a blog hop in celebration and that you have an opportunity to win some prizes!  If this is the first you've heard about our Anniversary Celebration and the chance to win fabulous prizes, make sure you click the Challenge Badge below and check out the details!

So this week is .... drum roll please.... Cardmaker's Choice!!  And the crowd goes WILD!!!!  So for my card I went with the Celebration idea!


I used my mini-treat bag framelits to make the envelope for my card.  Here is the inside...


I used the Pop of Pink Specialty DSP for the mini treat bag... I know, I know.. not a pop of pink in this paper, just gorgeous thick white with embossed gold dots.  I added a 1" strip of Emerald Envy and then a 3/4" piece of vellum that has gold embossed circles like the dsp to tone down the emerald strip.  I then added a strip of the new Emerald Envy Ruched Ribbon.  Next I added a MFT stitched die cut Gold Foil Circle.   On that I added an Emerald Envy Swirly Scribble Wreath and some Swirly Scribble Flowers in Peekaboo Peach.  The die cut portion was clear embossed.  Did you notice the small one?  It is just one of the centers of the flowers that I thought would make a cute mini flower. Lastly I added a wooden Celebrate embellishment and a little folded strand of gold sequin trim.  The card portion was Emerald Envy with Peekaboo Peach and Whisper White layered on.  The birthday sentiments were stamped in Emerald Envy and are from the Gina K Designs Birthday Greetings stamp set.  I just love some of the sentiments in that set.  Sometimes you just want more than Happy Birthday and isn't this one great!  I just LOVE the font!!


Here's a close of of the inside sentiments.  I stapled a small piece of the Emerald Envy Ruched Ribbon to the Emerald Envy cardstock layer prior to adding the Peekaboo Peach and White layers.  I thought that would make the card easier to pull out.

So I thought I'd share with you my prize contribution for one of the U.S. winners this week.. a set of MFT Die-namics Square Zig Zag Stitched Die Stax!


So make sure you upload a card on the Challenge Blog for your chance to win!  Winners will be announced June 20th!

Hope you enjoyed my project and will hop on along to the awesome blog of the amazingly talented Lisa Altman!  Just click the next button and you'll be there!


In case you are interested, here are the Stampin' Up! Products Used:

Mini Treat Bag Thinlits
Swirly Scribbles Thinlit Dies
Pop of Pink Specialty Designer Series Paper
Emerald Envy 3/8" Ruched Ribbon
Gold Sequin Trim
Gold Foil Sheets
Emerald Envy Ink
Versamark Ink
Clear Embossing Powder
Emerald Envy Cardstock
Peekaboo Peach Cardstock
Whisper White Cardstock


Other products Used:

MFT Die-Namics Stitched Circle Stax
Gina K "Birthday Greetings" Stamp Set

Blessings!  Tina

Sunday, June 12, 2016

Layering Love Watercolor Wash for CYCI #124

Hello!  Hope you are having a wonderful Sunday!  I love watercolor and I love sketches so today's CYCi #124 sketch was the perfect distraction for me today.


Here's my take on the sketch..


I started with a base of one of the new In Colors Sweet Sugarplum.  Layered on that is a piece of the Playful Palette DSP.. I absolutely LOVE this fun paper!  Next is a layer of watercolor paper that has a wash of Sweet Sugarplum and Peekaboo Peach.  Once dried with my Heat Tool.. I can never just wait on something to dry!  I stamped the sentiment from Layering Love in Basic Black Archival Ink.  I also used Gorgeous Grunge to add to stamped splatters of Sweet Sugarplum, Peekaboo Peach and Black.  I adhered this layer with Fast Fuse as it is a very strong hold and perfect for Watercolored Layers.  I then used my MFT Die-namics Zig Zag Rectangles to cut a shaker frame.  I added a few black sequins and some black seed beads to the shaker window. 

Thanks for stopping by!  Blessings, Tina


Thursday, June 9, 2016

OSAT Blog Hop - Summer Lovin'!

 Hello and welcome to the June One Stamp At A Time Summer Lovin' Blog Hop! If you have already been hopping you should have landed here from my friend Megan Thompson's blog!  Megan always has awesome stuff so if you started with me, make sure you hop all the way through and check her blog out! 

What do you think of when you think of Summer??  Well living in Tennessee, I think of heat and trying to find a way to cool off.  What better way than Ice Cream, right?? 


I was super happy that the awesome Sprinkles of Life Stamp Set was carried over into the new Stampin' Up! Catalog!  I just love this set!  Do you know what else reminds me of Summer?  These awesome bright colors in the Playful Palette Suite!  I just adore the Peekaboo Peach and Sweet Sugarplum paired with the black!  


I love the matching Playful Palette Washi Tape too!  In my card, I attached the Washi Tape to Very Vanilla cardstock and then cut it allowing a thin border.   The ice cream cone was stamped tone-on-tone with Peekaboo Peach.. I really think it looks so much like an actual cone! The ice cream scoops were punched with the Tree Builder Punch out of Very Vanilla (bottom scoop) and Playful Palette DSP for the two top scoops.  The sentiment was stamped using the Thoughtful Banners stamp set with Archival Black Ink onto Peekaboo Peach Cardstock.  I used my Duet Banner Punch to punch out the sentiment layer as well as a Black banner layer behind the sentiment.  I added a few Pretty Pink Posh sequins from their Spring Mix to finish off the front.


The sentiment stamped on the inside is also from the Sprinkles of Life stamp Set.  I added a couple of pieces of Washi Tape on the inside to match the outside.


My Post-It-Note holder is an Easel card base in Sweet Sugarplum. If you've never made an Easel card, click here to an earlier blog post where I have instructions and pictures.  I used the same three Washi Tape Strips as my card front.  The Live Laugh Love sentiment is from the Layering Love Stamp Set.  I cut it out the a Mama Elephant Die Set for the scallop edge.  I can't wait to get my hands on the new Layering Circle Framelits but unfortunately I don't have them yet :(

I hope you've enjoyed my card and project and are ready to head off to check out the Fabulous blog of Stampin' Up! Artisan Marisa Gunn!  Just click the next button and you'll be there!


In case you've lost your way.. here is a list of all of our Bloggers:

  1. Elizabeth Jeanne
  2. Alisa Tilsner
  3. Melissa Davies
  4. Renee Ondrajka
  5. Pam Staples
  6. Maria Willis
  7. Jeanna Bohanon
  8. Megan Thompson
  9. Tina Rackley Riddle - that's me!
  10. Marisa Gunn
  11. Kelly Acheson
  12. Andrea Tracy-Tucker
  13. Justin Krieger
  14. Dena Plummer Rekow
  15. Kim Smith
  16. Lori Mueller
Thanks so very much for stopping by! Blessings, Tina


Tuesday, June 7, 2016

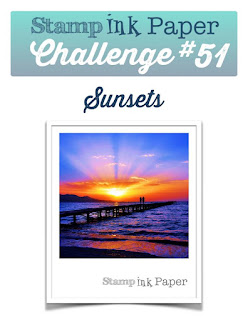
SIP Challenge #51 - Sunsets!


Hello and welcome to Stamp, Ink, Paper's Challenge #51!  This week's challenge is a theme and it is one of my favorite themes.. sunsets!

http://stampinkpaper.com/?p=1410
So this week I totally went out of my comfort zone and made an outdoor camping themed card for my daughter's sweet friend, Lauren.  Lauren LOVES to camp and boat.  They live in Middle Tennessee where the mountains looks like huge green hills!  lol  I will never forget the first time I went to the Smoky Mountains in East Tennessee.  I was living in Memphis at the time and had traveled from Memphis to Middle Tennessee numerous times to visit my relatives and was very familiar with the hills but had never seen a mountain.  In my mind's eye a mountain was a huge rock, and certainly didn't have any grass or trees.  Well man was I ever wrong!  The Great Smoky Mountains looks just liked the hills around my Grandparent's house only bigger!   


Since the mountains, water and camping are Lauren's Happy Place, I just stamped Happy on the sign.  I used a combination of My Favorite Things stamps and dies, Lawn Fawn stamps and dies and Mama Elephant Dies.  Whew!  That was a lot of different stamp companies.  Oh and of course I used Stampin' Up Cardstock.  

Here is a list of everything:
Stampin' Up! Mossy Meadow Cardstock (retired, sadly!)
Stampin' Up! Daffodil Delight Cardstock
Stampin' Up! Whisper White Cardstock
Stampin' Up! Watercolor Paper (for sun)
Memento Tuxedo Black Ink
Stampin' Up! Pool Party Ink (for water)
Stampin Up! Daffodil Delight, Crushed Curry and Pumpkin Pie Ink (sun)
Various Copics for coloring
Mama Elephant Creative Cuts Dies (Scallop and front layer stitched rectangle)
MFT Die-namics Zig Zag Circle (sun)
Lawn Fawn Stitched Mountain Borders
Lawn Fawn Grassy Border
MFT Warm & Fuzzy Friends (sign, fire, tent, trees and happy sentiment)
Lawn Fawn Dad & Me (pool and stream)

Thanks so much for stopping by!  Blessings, Tina


Wednesday, June 1, 2016

ICS Blog Hop Guy's Night Out


Hello and welcome to Inspire, Create, & Share's June Blog Hop!  This month's theme is all about the Guys!  If you have landed here by way of Terri Takashige's awesome blog, then thank you for continuing on!  If you started with my blog, make sure you click the next button at the bottom of my post so you can continue on for some more guy card inspiration!

If you have followed my blog at all, you should know that I make a lot of Nautical themed cards so guy card's aren't hard for me at all.  Well today I went nautical with my first card and nuts with my second! lol


I was so happy that the awesome stamp set From Land to Sea was being carried over to the new catalog! Today's card uses a sponged background of a shore, sea, and sunset along with the stamped lighthouse from the awesome stamp set.  You may also notice a little bit of marsh stamped on the left side.  That is from the Wetlands Stamp Set.  Instead of using the window framelit I made a picture window by using the new Nesting Square Framelits.  I am really going to love those new framelits!  I also put a small 1/4" strip of the white between the black cardstock on the bottom of the card and the black from the Neutrals Collection DSP stack on the top of the card.  I used a piece of window sheet inside the window frame so that it really does look like a window.  It's a little difficult to tell in the picture that the window sheet is there.  The sentiment is from the Thoughtful Banners Stamp Set and coordinating Duet Banner Punch.  In case the scene looks familiar, I made a card on an earlier post that was the same sponged and stamped scene.  Lately I have been doing a lot of duplicate scenes when sponging but using them on different cards or in a different way.  If you want to see my original card using this scene click here.

For my second card.. yep, you'll see I really did go nuts and quite messy! 


I started with a 5 1/2" x 8 1/2" Sahara Sand Cardbase that was scored at 4 1/4".  I punched out some acorns in Sahara Sand Cardstock with my Acorn Builder Punch and then sponged them with Sahara Sand Ink around the edges.  I adhered them with Tombow Multipurpose glue to the front of my cardbase.  I used some Gold Thread to run around my card front three times and knotted it in the middle front.  In the middle I added a Gold Foil Doily and then a 2" circle of Sahara Sand that was also sponged around the edges.  I stamped my Nuts About You Acorn image with Versamark onto Very Vanilla Cardstock and then heat embossed with Gold Embossing Powder.  I then made some loops with my gold thread onto the front of the circle and kept in place with dimensionals.  I punched out my embossed acorn and placed in the center over the thread and dimensionals.  I thinned out some Tombow Multipurpose Glue with some water and used my aqua painter to splatter some of the thinned out glue onto my card and then sprinkled some Gold Glitter over the glue.  I used a dry brush to brush off the excess.  As you can see quite a bit of it stuck. :)  I added a strand of Gold Sequin Trim in the upper left corner to finish this one off.  So this was a little nutty and a little mess but still super cute I think! 


Next up on the hop is my friend, Megan Thompson, just click the next button to continue on to her blog!


Thanks so much for stopping by!  Blessings, Tina